
Building a GPU PC, Part 9: Parts for an AI Research GPU Machine and Starting the Build

Yesterday I went to Akihabara and bought a total of about 415,000 yen worth of parts for a GPU machine, so here is a report.
GPU Machine Parts
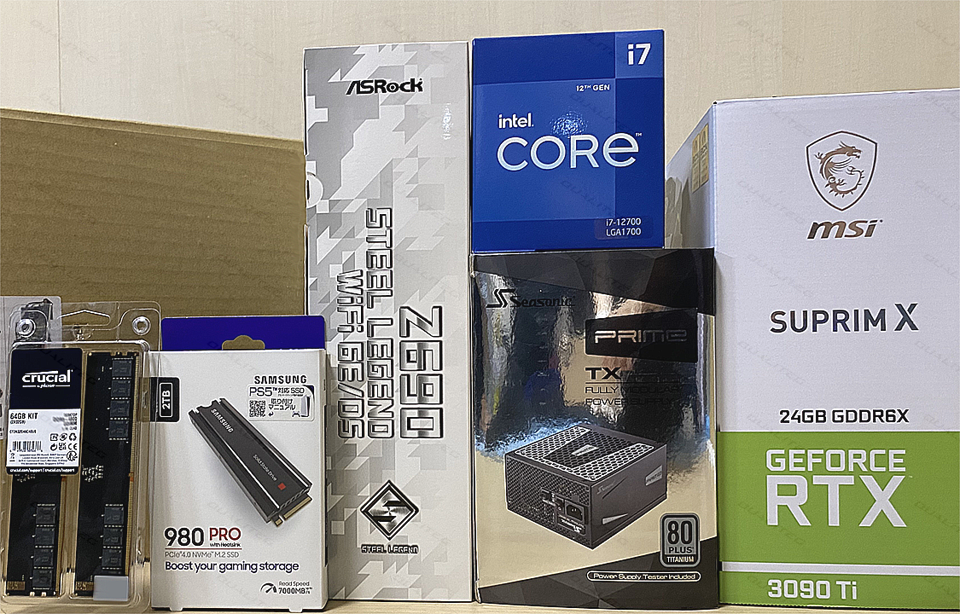
- Motherboard: ASRock Z690 Steel Legend approx. 40,000 yen
- Memory: Crucial desktop DDR5 32GB x 2 = approx. 30,000 yen
- CPU: Intel Core i7 12700 approx. 50,000 yen
- GPU:MSI SUPRIM X GeForce RTX 3090 Ti approx. 200,000 yen
- SSD:SAMSUNG 980 PRO 2T approx. 30,000 yen
- Power supply:850W OWLTECH PC power supply, 850W / ATX / Titanium approx. 45,000 yen
- Case:Fractal Design Focus G White Window approx. 10,000 yen
- SSD drive bay for dual boot: OWLTECH direct removable drive enclosure for 5.25-inch bays approx. 5,000 yen
- SSD for dual boot: Silicon Power SSD 512GB SATA 2.5-inch approx. 5,000 yen
Let's get straight to assembling it.
Tools Used for Assembly
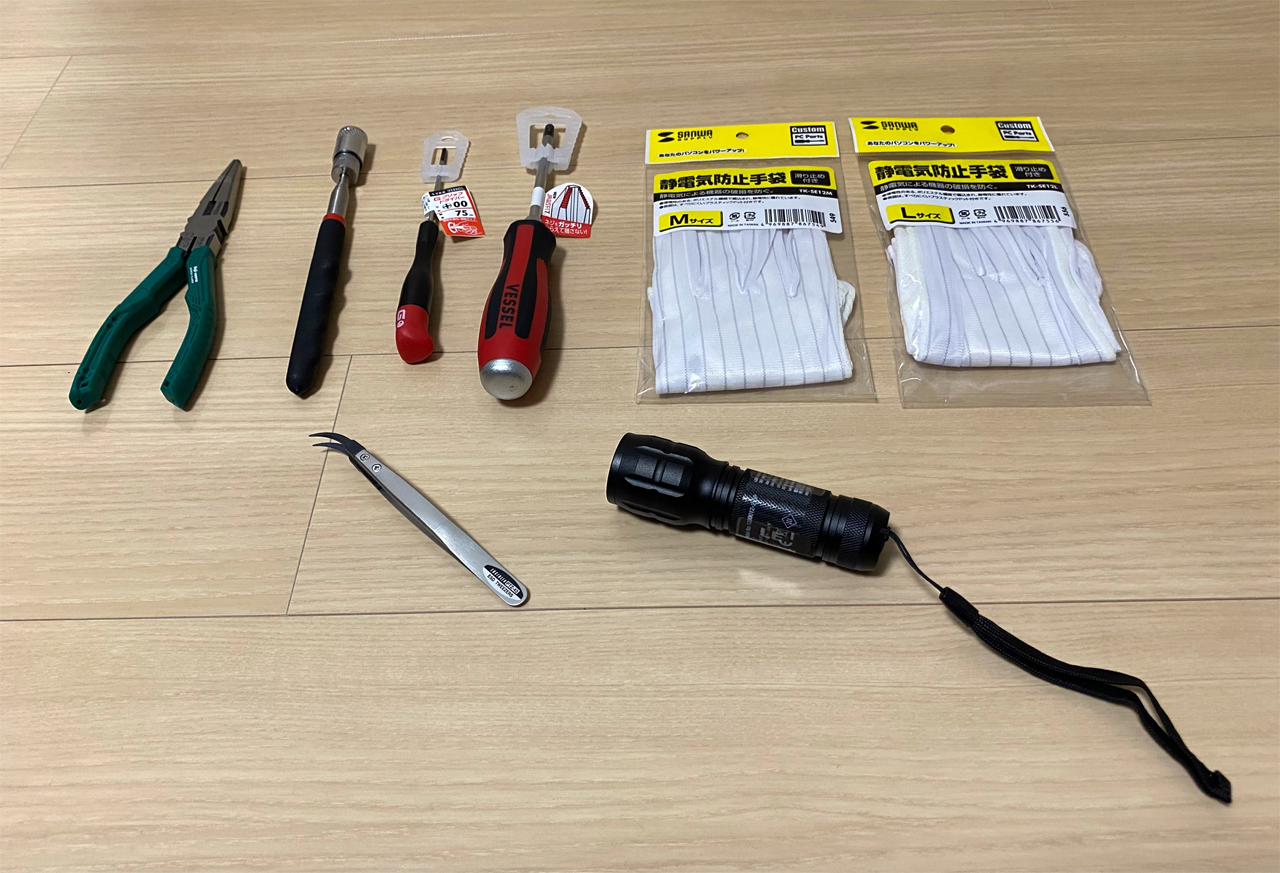
Aside from the peripheral parts, it is handy to have tools like the following.
| Item | Where it is used, tips |
|---|---|
| Phillips screwdriver, standard size | Used when assembling the case. |
| Flathead screwdriver | Used when assembling the case. Larger than a precision screwdriver, but slightly smaller than a standard-size one. |
| Anti-static gloves | Essential for assembly. Choose a pair that fits your hands snugly. |
| Tweezers for holding screws | Handy for holding a screw while you guide it into a screw hole, especially in spots where your fingers cannot easily reach. |
| Needle-nose pliers | Probably will not see much use, but having them around is reassuring, for example if you strip a screw head. |
| Headlamp | The kind you strap to your head. Very useful for lighting up your field of view when you need both hands to work while peering deep inside the case. |
| Flashlight | Handy in combination with the headlamp when working in deep areas hidden behind other parts. |
Now, let's start the build.
STEP 1. Installing the Power Supply in the PC Case
The case I used is the Fractal Design Focus G White.
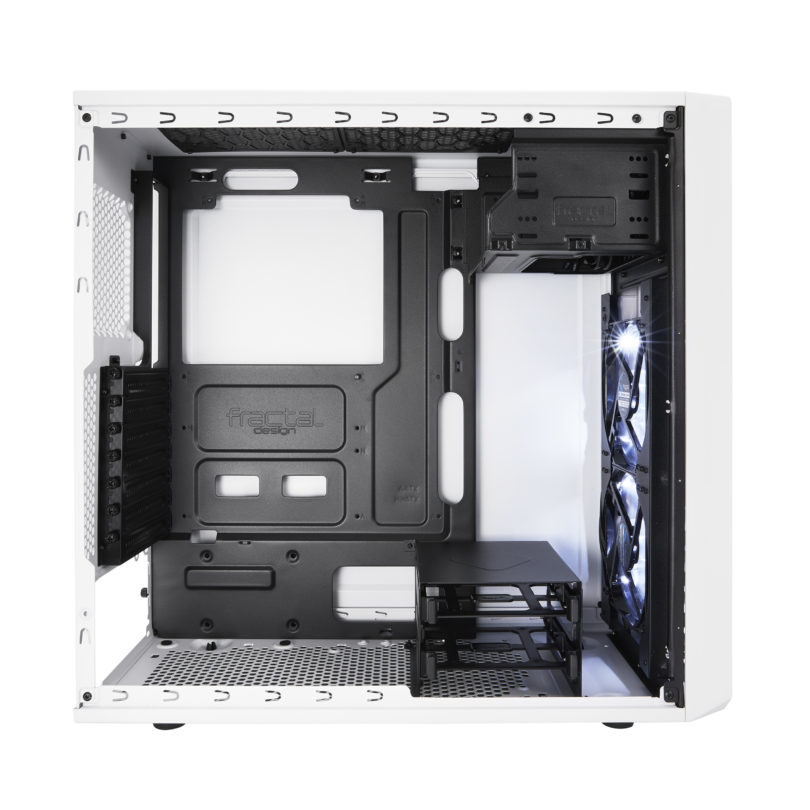
- Graphics card size: supports graphics cards up to 380 mm long
- Fans: a total of six fan positions to maximize airflow (two 120 mm fans are installed in the front by default; one rear, two top, one bottom)
- 5-inch bays: two 5-inch bays on the front panel (vibration-damped drive bays)
- 2.5-inch mounts: internal 2.5-inch mounts
Installing the Power Supply Unit in the Case
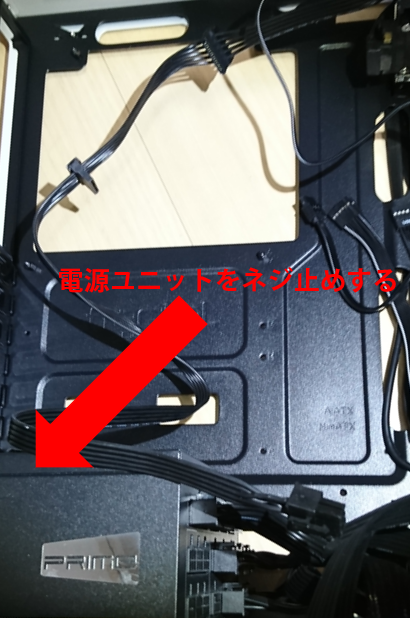
The power supply unit is a Seasonic 80PLUS Titanium-certified PRIME TX ATX power supply, PRIME-TX 850W.
- First, install the power supply unit in the case.
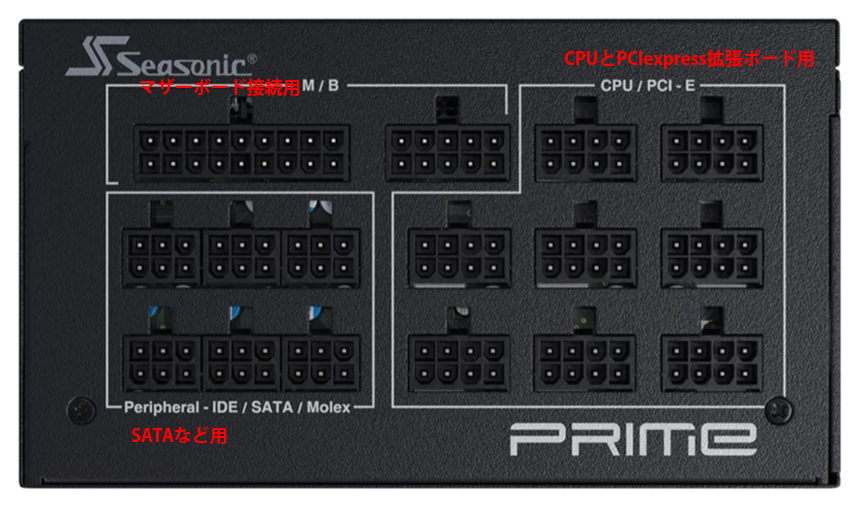
The connector side of the power supply unit looks like this. The one labeled M/B is for connecting to the motherboard, and CPU/PCI-E provides power for the CPU and PCI Express expansion cards. The one labeled Peripheral supplies power to peripherals such as SATA devices.
First, let's screw this power supply unit into the PC case.
Installing the SATA Removable Enclosure in the 5-inch Bay on the Front of the PC Case
I am being a little greedy with my machine and want to set it up for dual boot, so I am installing a SATA removable enclosure to hold the SSD for dual booting.
If all you want is dual boot, a removable enclosure is not necessary. However, I plan to switch between multiple operating systems such as Ubuntu, Windows, and FreeBSD, so I set things up this way to make the SSD easy to swap in and out.
For the removable enclosure, I am using the OWLTECH direct removable drive enclosure for 5.25-inch bays. This goes into the 5-inch bay.
Before inserting the removable enclosure into the 5-inch bay, you need to remove the 5-inch bay cover from the front panel of the PC case. To do this, release the tabs from the back using a flathead screwdriver or similar tool and take the cover off.
Then insert the SATA removable enclosure for the 5-inch bay from the front.
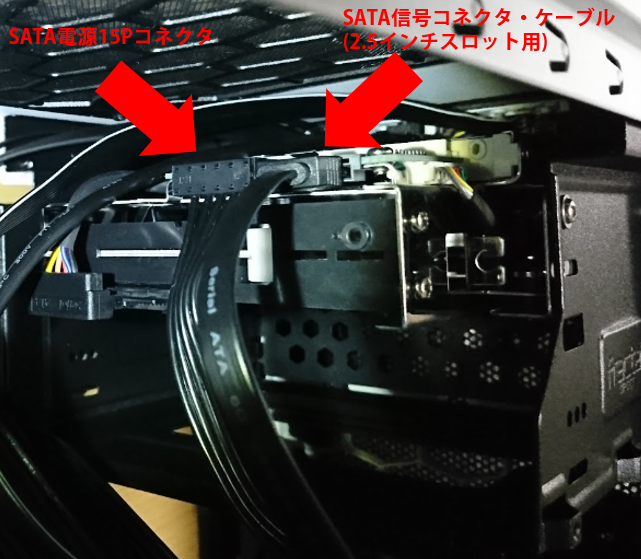
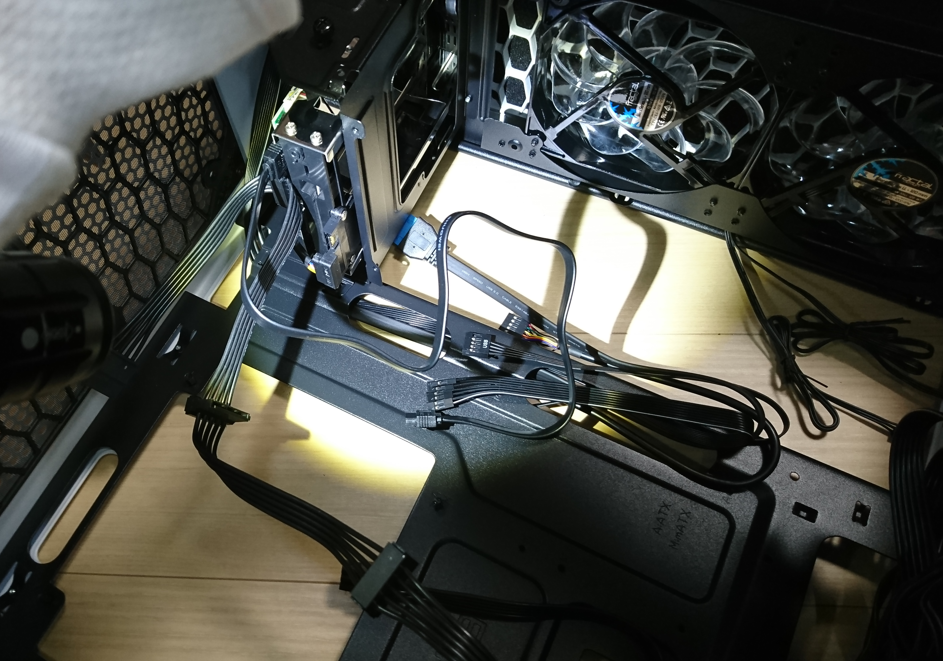
Once the removable enclosure is seated in the 5-inch bay, the next step is to connect the signal cable and the power connector.
Since I am using a 2.5-inch SSD this time, I plug in the 2.5-inch signal cable as shown below. I also plug in the SATA power connector as shown below.
Next, let's move on to setting up the motherboard and its surroundings.
Continued in the next entry.
Looking beyond DIY builds toward GPU environments for research and business?
The know-how gained from building your own GPU machine carries over directly to infrastructure choices for research, PoCs, and production.
We build and operate our own GPU cluster in-house and develop LLM products on it. We can also support a wide range of needs, from procuring GPU workstations for research to Intel Core and Intel Xeon architectures, covering everything from consumer to professional use. Beyond helping you procure and build workstations, we advise on what comes next, from setting up training environments to selecting the right GPUs, optimizing inference, and designing distributed configurations, all based on hands-on operational experience.
See our LLM infrastructure and platform technology services →navigation



