
Setting Up a Raspberry Pi 5 Without a Monitor: From OS Imaging to SSH Using Only a Windows PC
Set up a Raspberry Pi 5 with no monitor or micro HDMI cable, using only a Windows PC. We use the Raspberry Pi Imager CLI and firstrun.sh to preconfigure Wi-Fi and SSH, with the full procedure and measured timings — about 3 minutes from SD card insertion to an SSH connection.

Hello!
This is the Qualiteg Product Development Team!
This article kicks off a series on how to control a Raspberry Pi over the internet.
As shown in the diagram below, the series goes like this:①After the headless setup (this installment), we'll harden the Raspberry Pi as a security measure in preparation for exposing it to the internet (part 2), and then make a web server running inside the Raspberry Pi directly accessible from the internet (part 3).
In this first installment, we'll cover everything from getting your hands on a Raspberry Pi to the initial setup procedure.
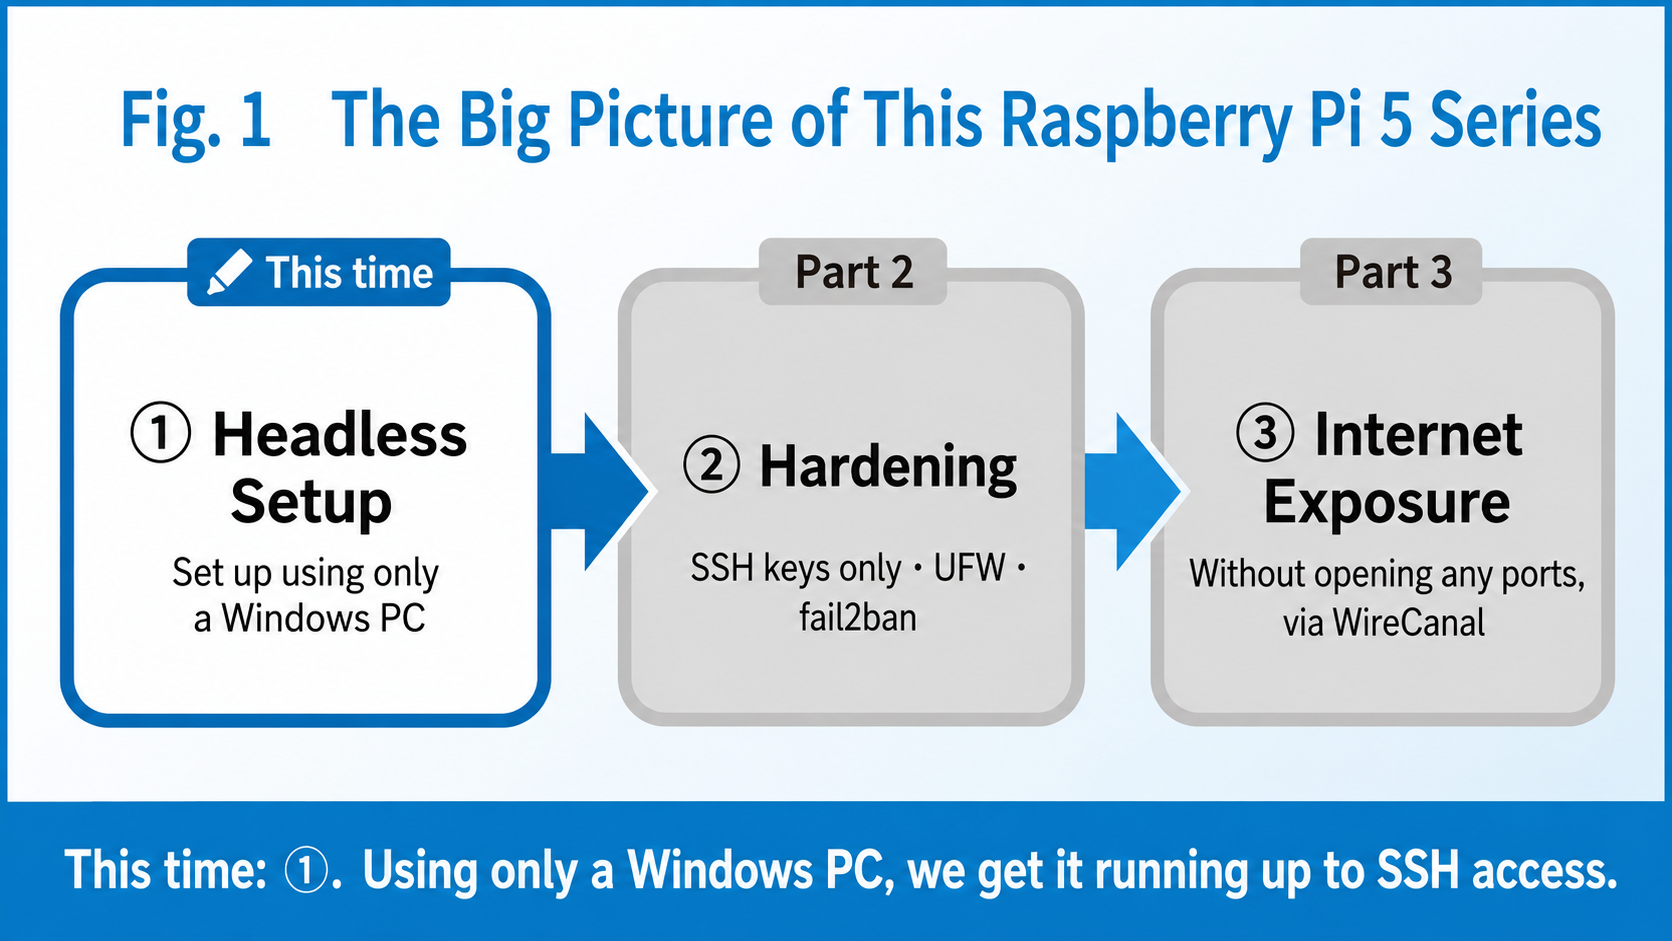
We'll walk through the steps we used to go from writing the OS to connecting over SSH using only a Windows 11 PC, with actual measured timings. From inserting the SD card and powering on to logging in via SSH took about 3 minutes.
What You'll Need
- Raspberry Pi 5 board — we use the 4GB model in this article.
- microSD card — 64GB this time. It gets automatically expanded to full capacity on first boot
- Heatsink for the Raspberry Pi 5 — for thermal management
- USB card reader — for writing the Raspberry Pi image to the SD card
- A Windows 11 PC
- USB-C power supply (the Raspberry Pi 5 recommends 5V/5A power, such as the official Raspberry Pi 27W USB-C Power Supply. A 5V/3A-class charger may boot depending on your configuration, but you may run into power throttling or unstable behavior)
Setting Up the Hardware
Assembly
Alright, let's get the Raspberry Pi assembled!
Here's the Raspberry Pi.
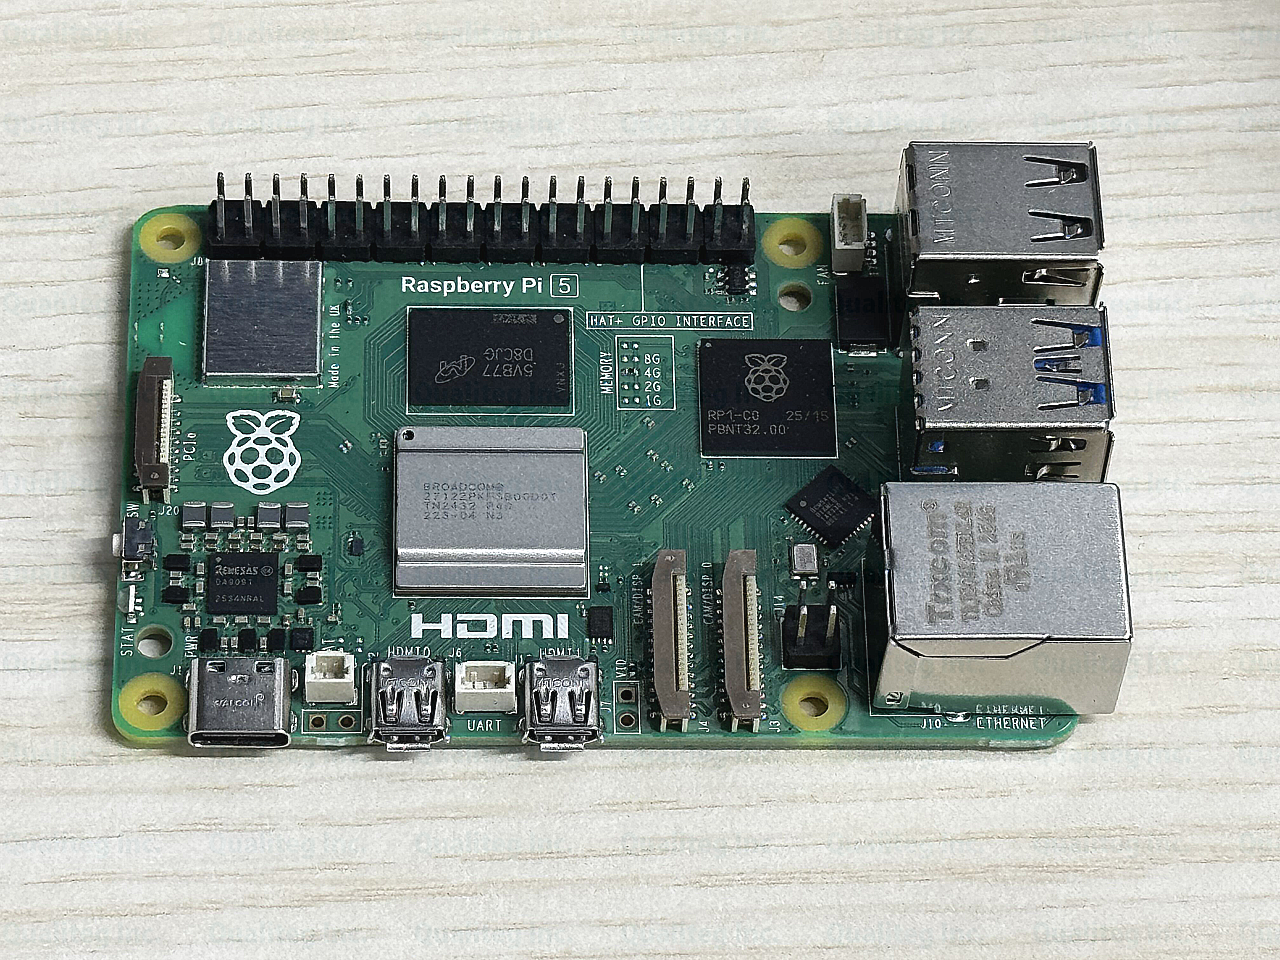
First, let's attach the heatsink for thermal management.
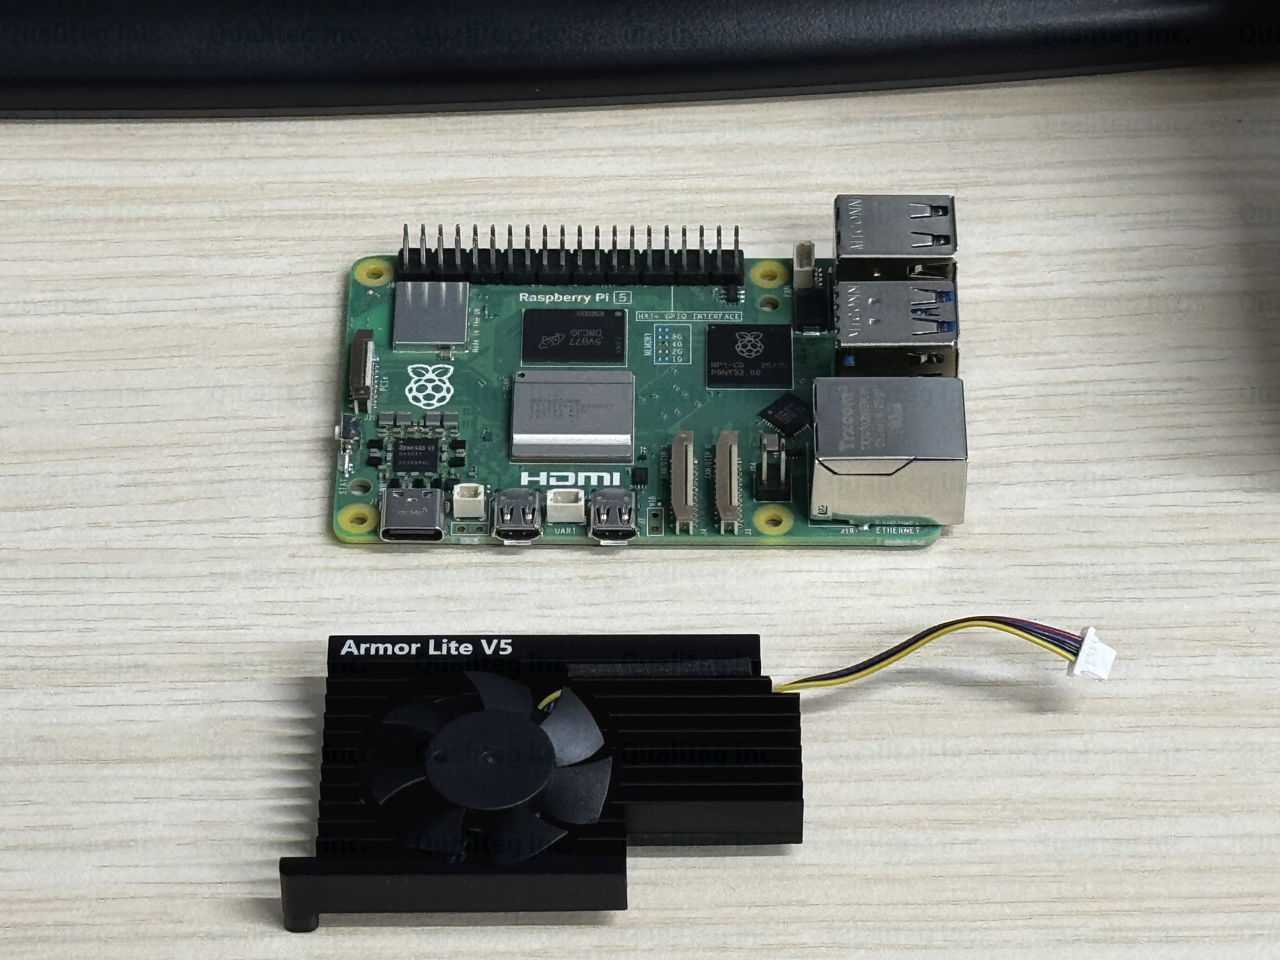
Before attaching the heatsink, stick the included silicone-rubber-like material onto the heat-generating parts such as the CPU chip. These are what's known as thermal pads.
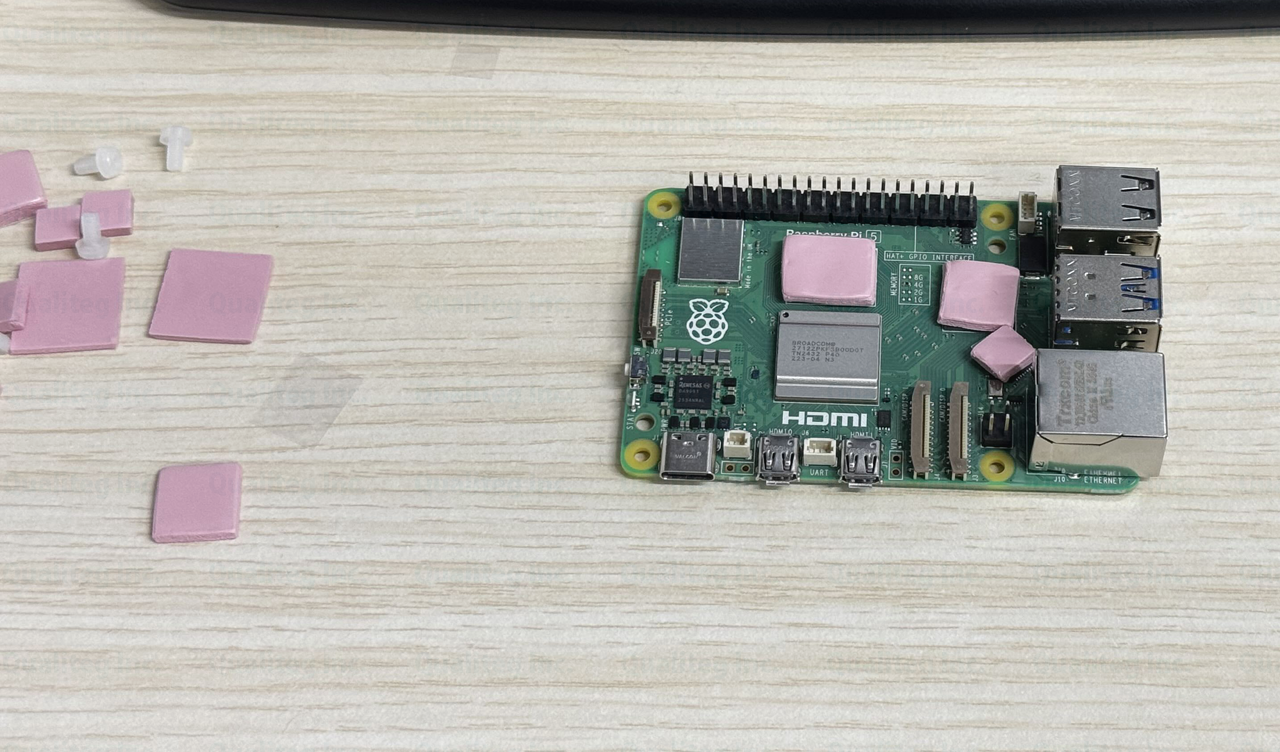
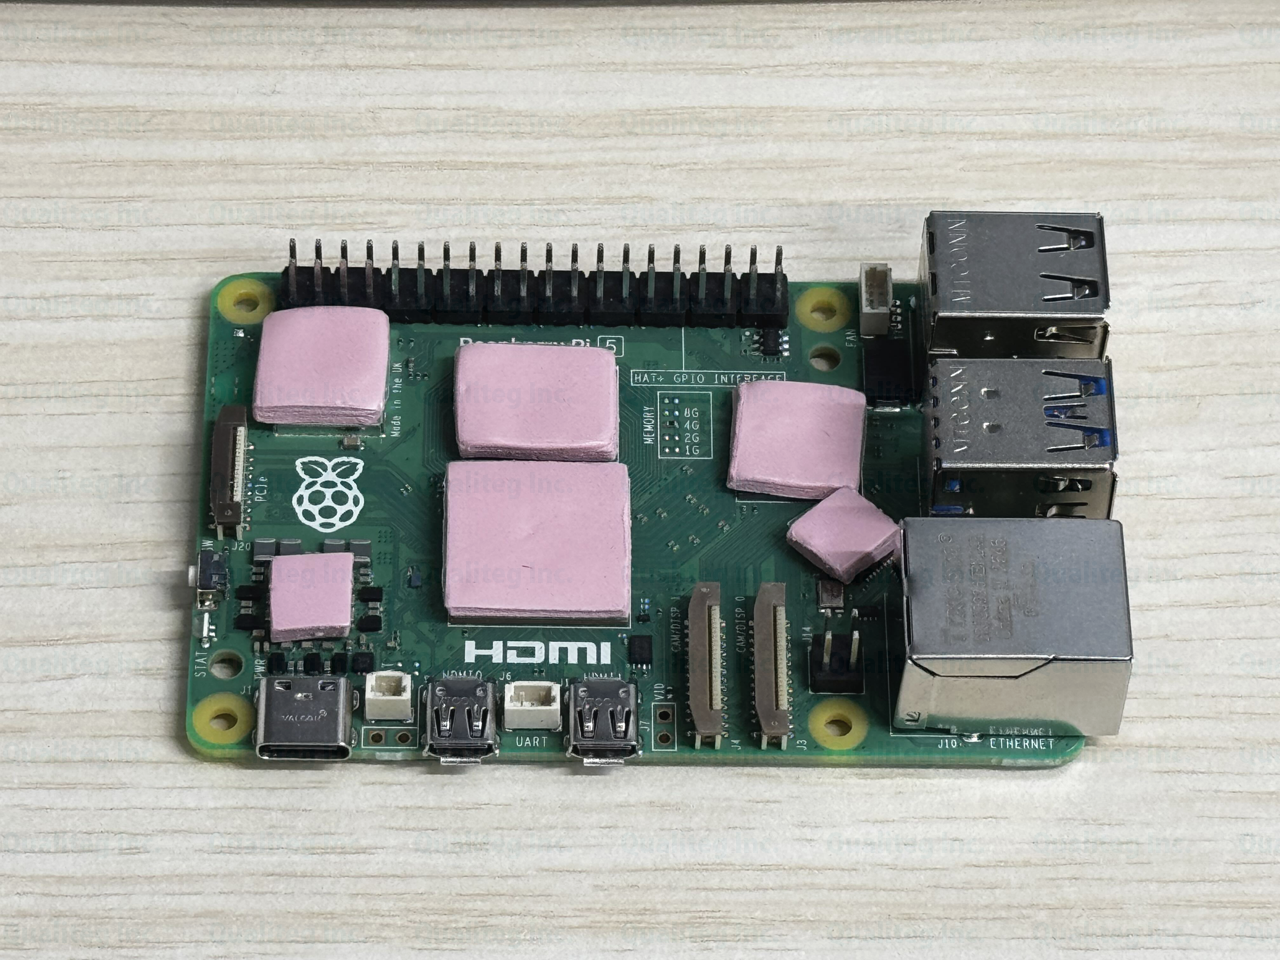
OK, with all the thermal pads in place, let's attach the heatsink itself.
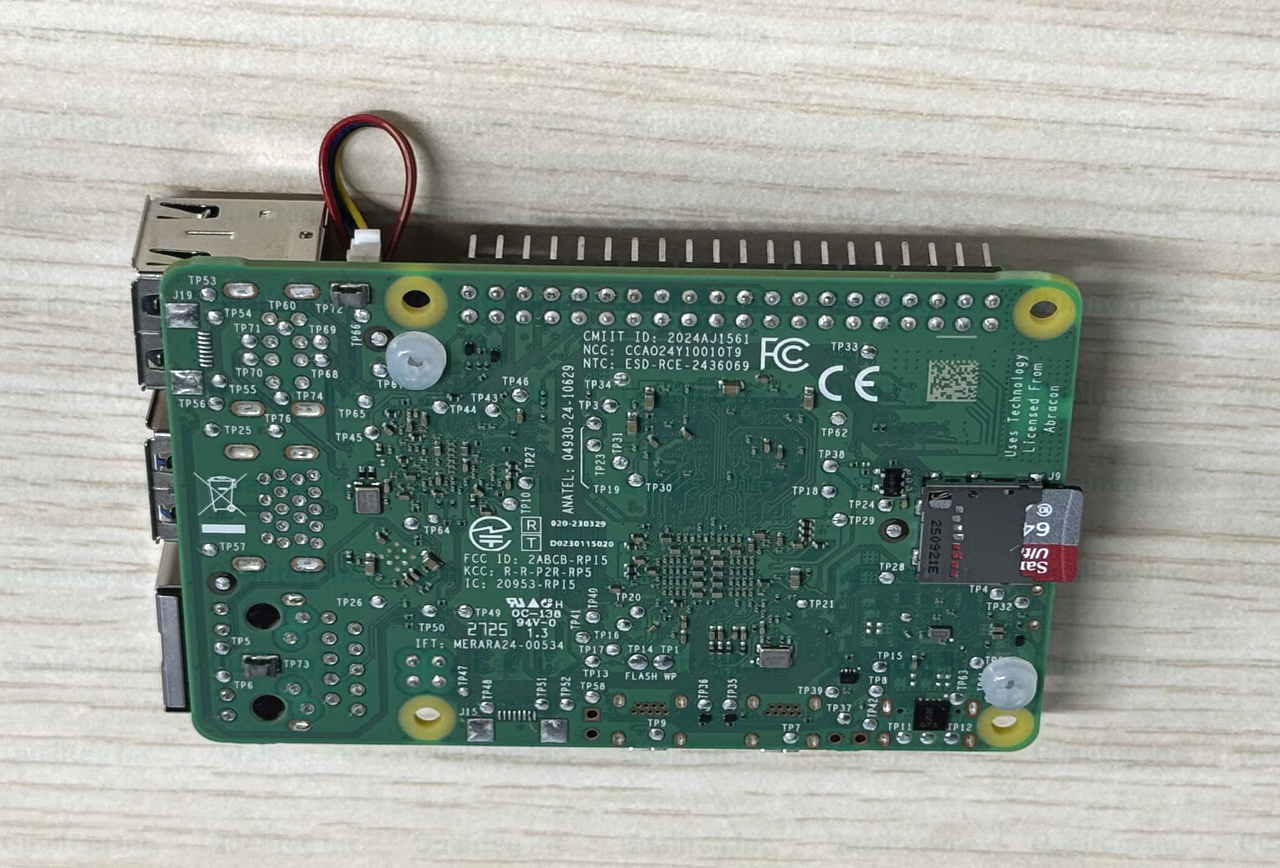
Fasten the heatsink from the back side with the insulated plastic screws like this, and you're done.
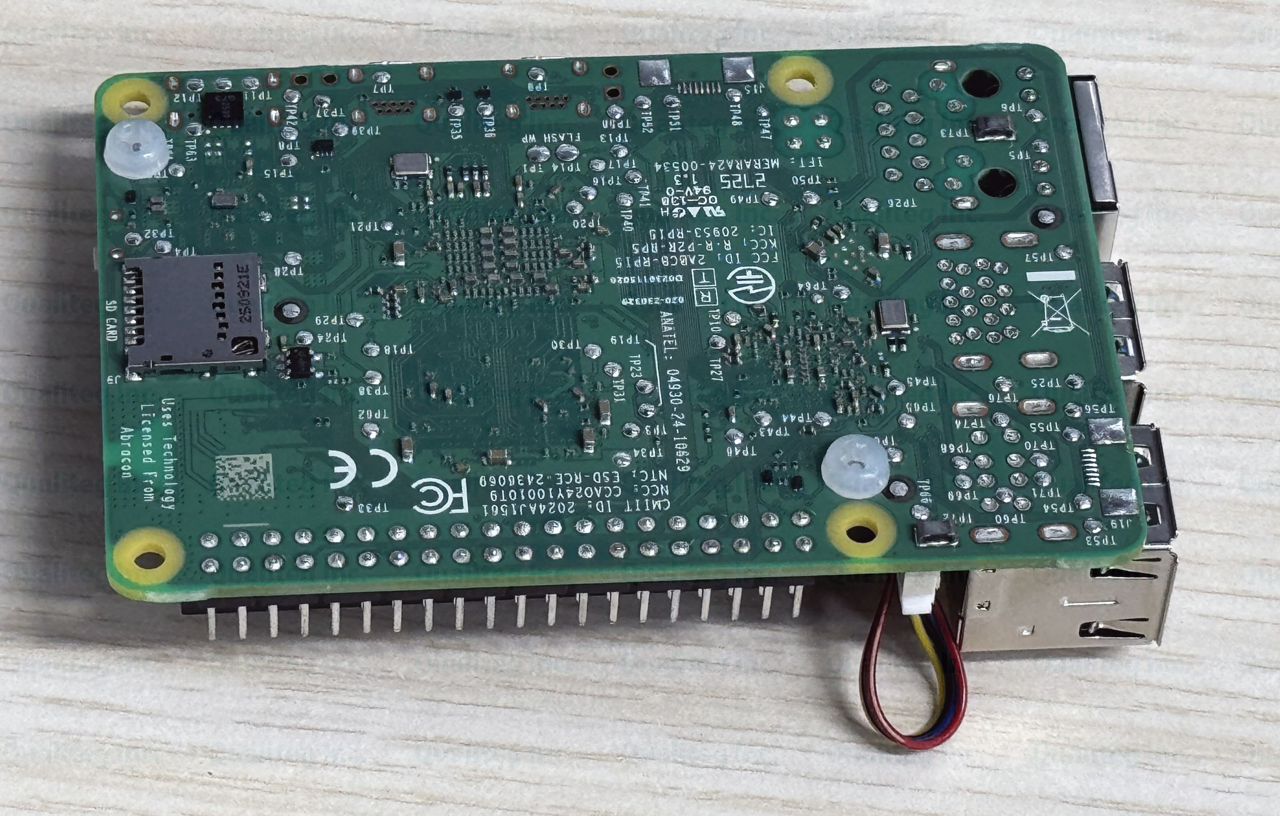
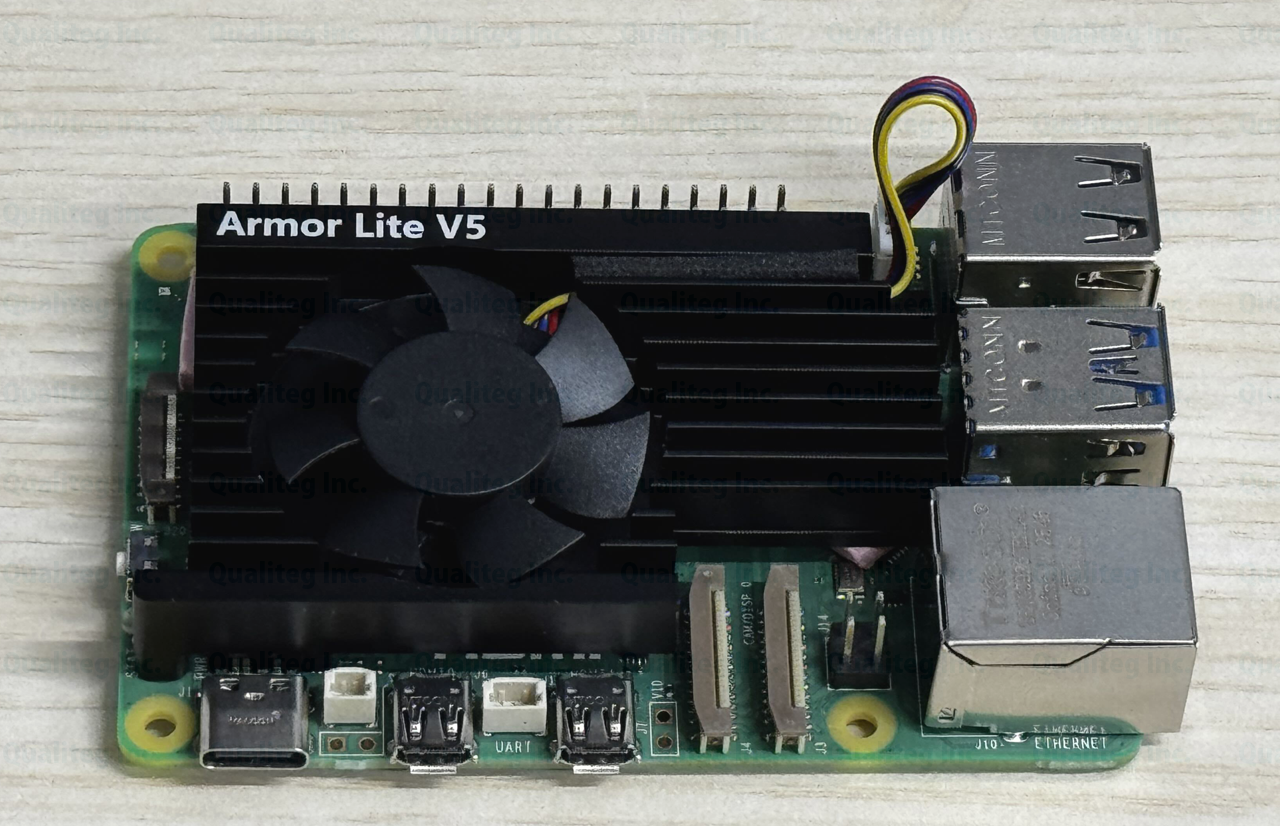
The heatsink is now attached.
There's a fan power connector on the upper part of the Raspberry Pi board, so plug the power cable coming from the heatsink into it.
By the way, don't insert the SD card yet. There's nothing on it, so inserting it wouldn't do anything.
Everything up to this point should only take a few minutes.
Next, let's move on to the software.
Setting Up the Raspberry Pi Without a Monitor
Let's get right into the software setup.
This time we'll set everything up using only the CLI — in other words, a headless setup.
The environment we verified this on:
- Imaging software: Raspberry Pi Imager 2.0.8
- OS written: Raspberry Pi OS 64-bit (based on Debian 13 trixie, kernel 6.18)
- Work PC: Windows 11 Pro.
Step 1: Identify the Physical Disk Number to Write To
We'll start by preparing the SD card to insert into the Raspberry Pi.
For that, we use the dedicated imaging tool, Raspberry Pi Imager 2.0.8.
Writing to an SD card happens at the physical-disk level, so first confirm the disk number.
Raspberry Pi Imager 2.0.8 has a safety mechanism that refuses to write to devices that shouldn't be targets, such as internal drives. Even so, if you mix up another USB storage device you'll wipe its data, so always verify the disk number, capacity, and BusType.
Connect the SD card to your PC with the card reader and run the following in PowerShell.
Get-DiskNumber FriendlyName BusType SizeGB
------ ------------ ------- ------
0 CT4000P3PSSD8 NVMe 3726
1 Generic- SD/MMC/MS PRO USB 59.5In our environment, the internal SSD showed up as disk 0 and the SD card via the USB card reader as disk 1. From the capacity (59.5GB) and the BusType being USB, we can tell it's the SD card.
In the steps that follow we specify the write target as \\.\PhysicalDrive1. Be sure to substitute the disk number for your own environment.
Step 2: Get Raspberry Pi Imager and the OS Image
Raspberry Pi Imager can be installed with winget.
winget install --id RaspberryPiFoundation.RaspberryPiImager --silent --accept-package-agreements --accept-source-agreementsIt installs to C:\Program Files\Raspberry Pi Ltd\Imager\. The same executable used by the GUI has a CLI mode, and a scripting wrapper, rpi-imager-cli.cmd, is bundled as well.
Get the OS image from the official download site.
The URL raspios_arm64_latest always redirects to the latest 64-bit version (with desktop), which is handy to remember.
curl.exe -L --fail -o C:\qualiteg_examples\raspi\raspios.img.xz https://downloads.raspberrypi.com/raspios_arm64_latestThe size was about 1.3GB. It can be written while still xz-compressed, so there's no need to extract it yourself.
Step 3: Create the First-Boot Script firstrun.sh
This is the heart of the headless setup.
We call the helpers imager_custom and userconf that ship with Raspberry Pi OS to configure the hostname, SSH, user, Wi-Fi, keyboard layout, and timezone all at once. Name the file firstrun.sh; it can live anywhere (you'll pass its path when writing the image in the next step).
#!/bin/bash
# set +e keeps the script running to the final cleanup even if a command fails along the way.
# If a setting doesn't take effect, check the success/failure of each command individually
set +e

/usr/lib/raspberrypi-sys-mods/imager_custom set_hostname raspberrypi
/usr/lib/raspberrypi-sys-mods/imager_custom enable_ssh
/usr/lib/userconf-pi/userconf 'pi' '$6$… (hash generated with openssl passwd -6)'
/usr/lib/raspberrypi-sys-mods/imager_custom set_wlan 'your-ssid' 'your-wifi-password' 'JP'
/usr/lib/raspberrypi-sys-mods/imager_custom set_keymap 'jp'
/usr/lib/raspberrypi-sys-mods/imager_custom set_timezone 'Asia/Tokyo'

rm -f /boot/firstrun.sh /boot/firmware/firstrun.sh
sed -i 's| systemd.run.*||g' /boot/cmdline.txt /boot/firmware/cmdline.txt 2>/dev/null
exit 0
Replace the SSID and Wi-Fi password ('your-ssid' and 'your-wifi-password' in the script above) with your own.
The user's password is passed as a SHA-512 hash, not in plain text. You can generate the hash in Git Bash or similar like this.
openssl passwd -6 'your-desired-password'The last two lines are cleanup: the script deletes itself and restores normal boot. They remove the entry that Imager plants in the boot configuration (cmdline.txt).
There is one important caveat.
The line endings of this file must be LF.
Files created in a Windows editor tend to end up as CRLF, and with CRLF the script fails on first boot. SSH never gets enabled, Wi-Fi never connects, and with no monitor you can't even see what went wrong — a rather painful situation.
One security note as well: firstrun.sh contains your Wi-Fi password in plain text. Avoid committing it to Git or placing it in shared folders, and delete any working copies left on the Windows side once they're no longer needed.
Step 4: Write to the SD Card from the CLI
Writing to a physical disk requires administrator privileges, so run it elevated from PowerShell. Approve the UAC dialog when it appears.
$imgr = 'C:\Program Files\Raspberry Pi Ltd\Imager\rpi-imager.exe'
$opts = @('--cli', '--debug', '--disable-eject',
          '--first-run-script', 'C:\qualiteg_examples\raspi\firstrun.sh',
          '--log-file',         'C:\qualiteg_examples\raspi\flash-log.txt',
          'C:\qualiteg_examples\raspi\raspios.img.xz',
          '\\.\PhysicalDrive1')
Start-Process -FilePath $imgr -ArgumentList $opts -Verb RunAs -Wait
Here's what the options we're using mean.
| Option | Role |
|---|---|
| --cli | Run in command-line mode without launching the GUI |
| --first-run-script | Embed the first-boot script (firstrun.sh) into the SD card |
| --log-file | Write progress and results to a log file |
| --debug | Make the log verbose. Also records how write speed is auto-adjusted |
| --disable-eject | Don't auto-eject the SD card after writing completes. Add this if you want to inspect the write results |
Read-back verification after writing is enabled by default. In our measurements, extracting the 1.3GB xz image took 53 seconds, and writing plus verification finished in about 5 minutes. With a slow SD card the log will show write-latency warnings, but Imager automatically adjusts the buffer size and keeps going, so just wait it out.
A note on progress display: with our setup, launching elevated via Start-Process -Verb RunAs, no progress appeared in the original PowerShell window. That's why we pass --log-file and check progress and results in the log file. If the log ends with succeeded, the write was successful.
Step 5: Power On, Wait 3 Minutes, and Connect via SSH
Insert the freshly written SD card into the Raspberry Pi 5.
Then simply connect the USB-C power supply and it boots.
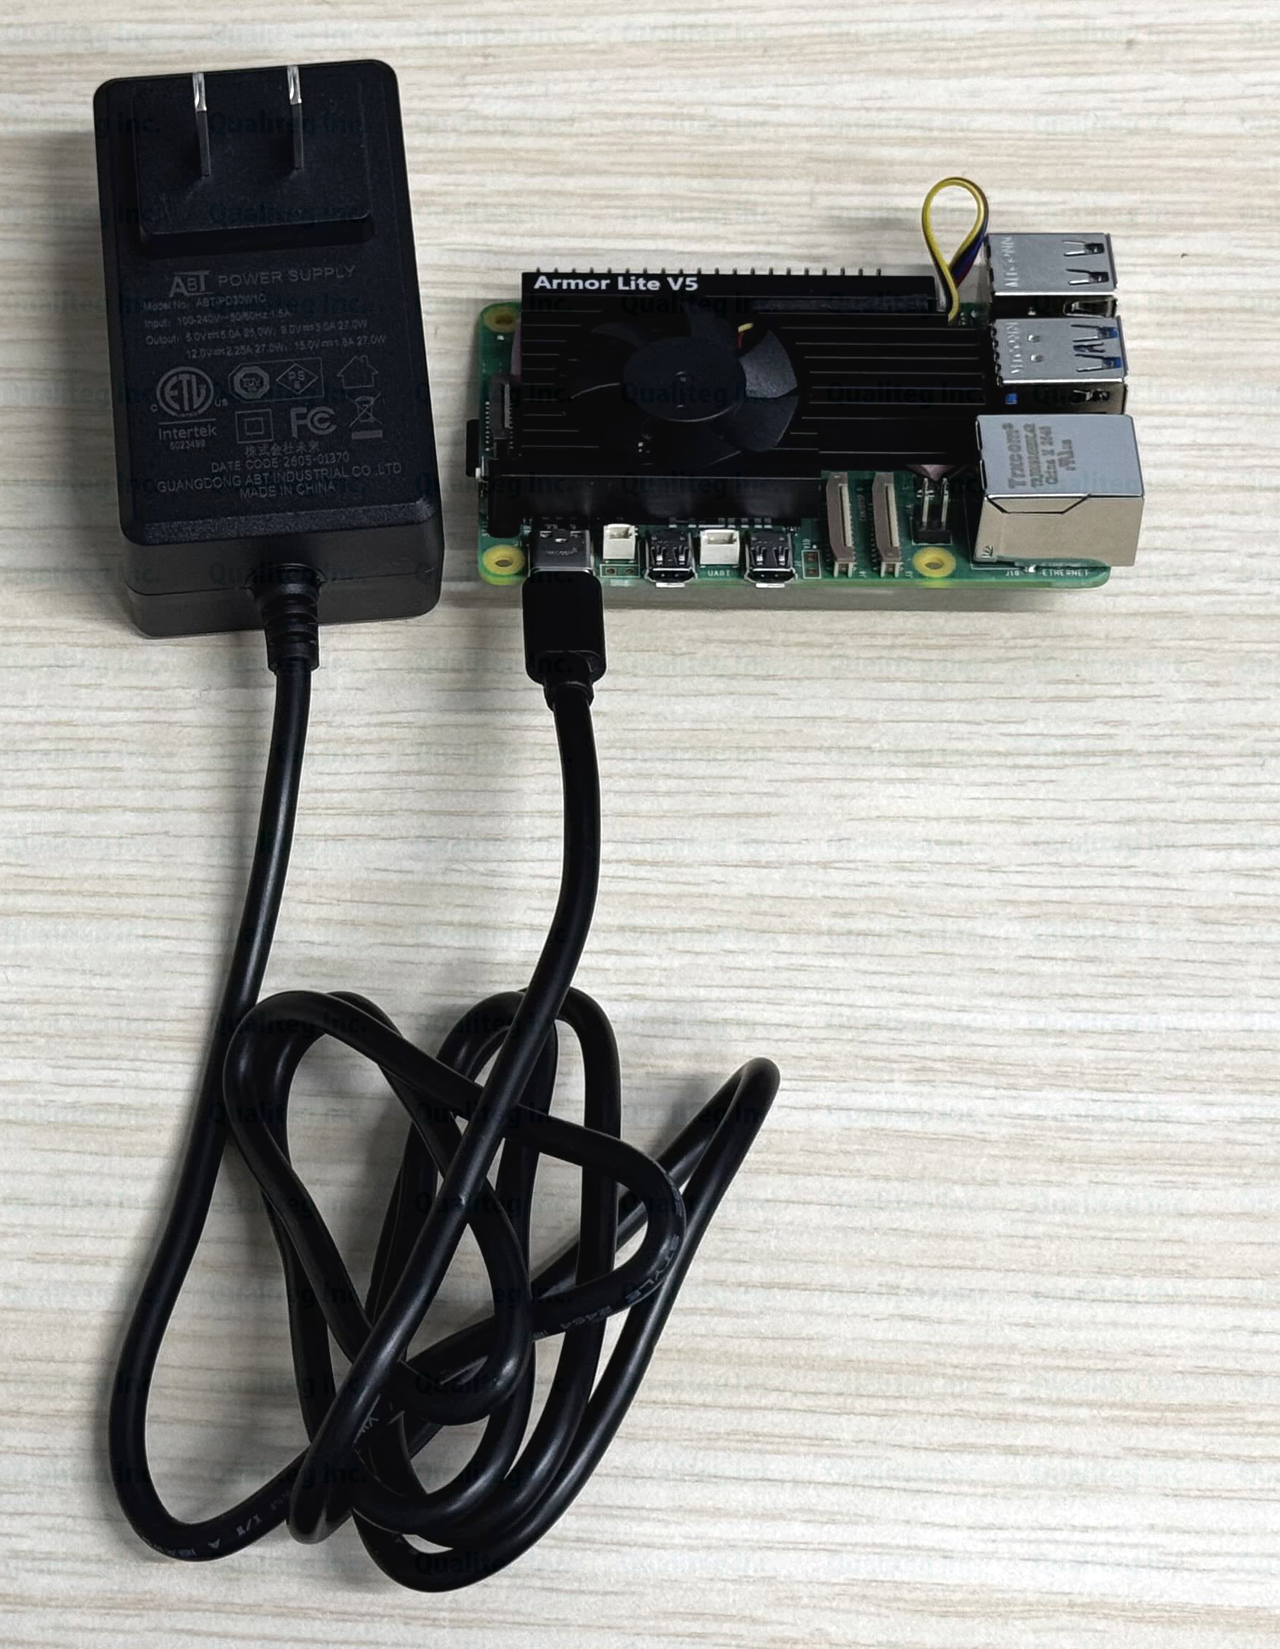
The Raspberry Pi 5 does have a power button, but no button press is needed for a normal first boot. On first boot it runs filesystem auto-expansion, firstrun.sh, and a reboot in sequence, so wait 2–3 minutes. If the green LED on the board is blinking, the boot process is underway.
Once you've waited, connect via SSH from a Windows terminal.
ssh pi@raspberrypi.localThe name raspberrypi.local is resolved by a mechanism called mDNS. Windows 11 supports it out of the box, so no extra software is needed. In our measurements, the SSH port opened about 3 minutes after inserting the SD card and powering on, and we could log in with the user we configured.
We also checked the state after logging in. Here are excerpts from the output of uname -a, vcgencmd measure_temp, and df -h.
Linux raspberrypi 6.18.34+rpt-rpi-2712 #1 SMP PREEMPT Debian 1:6.18.34-1+rpt1 (2026-06-09) aarch64 GNU/Linux
temp=34.0'C
/dev/mmcblk0p2   58G  6.6G   49G  12% /
The entire 64GB card had been expanded into the root filesystem, the CPU temperature was 34.0°C, and an IPv4 address had been obtained over Wi-Fi.
From here on, you can use it like any ordinary Linux machine.
Pitfalls and Workarounds
Here's a table of the traps we actually hit during this work.
| Symptom | Cause | Workaround |
|---|---|---|
| When run elevated, progress may not appear in the original PowerShell | With our elevated launch via Start-Process -Verb RunAs, no progress was shown in the original PowerShell window (observed) | Have it write to a log file with --log-file and check progress and results there |
| Writing fails with access denied | Writing to a physical disk requires administrator privileges | Run elevated with Start-Process -Verb RunAs |
| After first boot, no Wi-Fi connection and no SSH | The line endings of firstrun.sh are CRLF, so the script fails to execute | Re-save with LF line endings and redo the write |
| raspberrypi.local can't be found, or an IPv6 address is returned | mDNS name resolution may prefer IPv6 | Usually you can connect as is. If not, check the IPv4 address in your router's admin panel and specify it directly |
| Automated connections from a script with plink hang on first use | The host-key confirmation prompt doesn't accept responses piped through standard input | Use -batch and -hostkey "SHA256:..." to specify the fingerprint explicitly and suppress the prompt entirely |
That last plink trap is a bonus note for anyone who wants to script the whole flow up to the SSH connection. You won't hit it when typing the ssh command by hand.
Summary
A monitor-less Raspberry Pi 5 setup can be completed safely if you keep these five points in mind.
- Confirm the physical disk number with Get-Disk before writing (most important)
- Get the OS image from raspios_arm64_latest and write it while still xz-compressed
- Put your Wi-Fi, SSH, and user settings into firstrun.sh. Line endings must be LF
- Run the write with administrator privileges and check the results in the --log-file log
- Wait 3 minutes after first boot, then ssh pi@raspberrypi.local
Once you can log in, we recommend changing the password and updating packages as your first moves.
passwd
sudo apt update && sudo apt full-upgrade -y
If you find yourself wanting a desktop, enabling VNC with sudo raspi-config lets you operate it from Windows like a remote desktop.
We plan to cover that in a separate article.
See you next time!



