
Use a Local LLM on Your Home PC from Your Phone While Out: Ollama + Open WebUI + WireCanal
Add a chat interface to the local LLM on your home PC (Ollama + gemma4) with Open WebUI, expose it safely through a tunnel, and use it from your phone while out — a fully measured, step-by-step guide. No Docker, no WSL, and no port forwarding required.

Hello!
If you run a local LLM on a GPU-equipped PC at home, sooner or later a moment arrives when you are out and think, "I'd like to ask my own model about this."
Your home PC carries models you chose or tuned yourself, and your conversation history can stay on your own machine.
Having built that environment, it is only natural to want to use it from your phone as well.
At the same time, opening a port on your home router and exposing it to the outside is an uncomfortable prospect.
To state the conclusion up front:
with a single Windows PC, you can get to a state where you chat in Japanese with your home LLM from your phone while out
. No Docker, no WSL, and no port forwarding involved.
This article walks through the entire procedure: running a local LLM with Ollama and gemma4, adding a chat interface with Open WebUI, exposing it through a tunnel, and using it from an actual smartphone.
Every step, command, and screen shown here was actually run and verified by the author. The test machine is Windows 11 Pro with a GeForce RTX 3090 Ti (24GB), but with an appropriate model choice the same setup works on a 12GB-class GPU.
Note that this article covers using your home PC's LLM from outside, by yourself, for yourself.
Step 1: Install Ollama and Run gemma4 on the GPU
First, install Ollama, the runtime that runs the LLM.
From the official Ollama site, simply download and run OllamaSetup.exe. Walking through the wizard completes the install (the author used the silent install OllamaSetup.exe /VERYSILENT; the version verified was v0.32.6).
The GPU is detected automatically, so no manual CUDA setup is required.
One thing worth deciding in advance is where models are stored. By default, models accumulate in your user folder on the C drive. A single model can easily consume around 10GB, so if you want to move them to a larger drive, specify the location with a system environment variable.
The author used the D drive as the storage location.
OLLAMA_MODELS = D:\qualiteg_examples\ollama-modelsFor the model, we chose gemma4 (a 9.6GB download) from the top of Ollama's library rankings — its Japanese is natural and it fits within our GPU.
ollama pull gemma4Once the download completes, verify it works. Here we ask, in Japanese, "What is the capital of Japan?" and it answers "Tokyo."
> ollama run gemma4 "日本の首都は"
東京(とうきょう)です。
Whether the model is loaded on the GPU can be checked with ollama ps.
NAME             ID              SIZE      PROCESSOR    CONTEXT
gemma4:latest    c6eb396dbd59    3.4 GB    100% GPU     32768
If PROCESSOR shows 100% GPU, you are in good shape. If it has fallen back to the CPU, responses become orders of magnitude slower, so be sure to check this. Incidentally, while the download is 9.6GB, on the author's Ollama 0.32.6 the SIZE column in ps showed 3.4GB (reported here as measured, without adjustment).
Step 2: Eliminate the "No Reply the First Time" Problem Up Front
This was the most alarming moment during the build.
Ask a question after leaving the machine idle for a while, and the screen stays silent for tens of seconds. Suspecting something was broken, we checked the logs — the inference itself had finished in 2.1 seconds.
The culprit is Ollama's default behavior.After 5 minutes of inactivity, it unloads the model from the GPU.The moment the next question arrives it reloads all 9.6GB, and during that time the system appears unresponsive.
When using it from a phone while out, the typical pattern is "open it occasionally and ask one question," which means hitting this reload every time. Keep the model resident via a system environment variable.
OLLAMA_KEEP_ALIVE = -1After setting it, restart Ollama and check ollama ps — the UNTIL column will show Forever.
NAME             ID              SIZE      PROCESSOR    CONTEXT    UNTIL
gemma4:latest    c6eb396dbd59    3.4 GB    100% GPU     32768      Forever
Now the very first question gets an immediate answer no matter how long the machine sits idle. If the PC's GPU is also used for gaming or training, look for a compromise with a value like 24h instead of -1.
Step 3: Open WebUI Installs with pip (No Docker Needed)
For the chat interface we usedOpen WebUI.
It is a well-established OSS project with a ChatGPT-like UI that discovers Ollama automatically.
Open WebUIofficially supports installation via pip.
Open WebUI supports Python 3.11 and 3.12; 3.13 is not supported
(the official recommendation is 3.11; the author created a 3.11.15 environment with conda, though venv works just as well).
pip install open-webuiWith its many dependencies, this takes a few minutes. Once installed, start it with two environment variables (the version verified was v0.11.0).
$env:OLLAMA_BASE_URL = 'http://localhost:11434'
$env:DATA_DIR = 'D:\qualiteg_examples\open-webui-data'
open-webui serve --port 3000
OLLAMA_BASE_URL points to the Ollama instance from Step 1, and DATA_DIR is where user data and chat history are stored.
In the author's environment, about 35 seconds after startup http://localhost:3000/health returned {"status":true}.
Open http://localhost:3000 in a browser and you will be prompted to create the first account.The first account created here becomes the administrator.Publishing comes later, but make it a firm habit: complete the administrator registration before exposing anything. If you publish first, any third party who happens to hit the URL could become the administrator.
Step 4: Expose It Externally Without Opening an Inbound Port
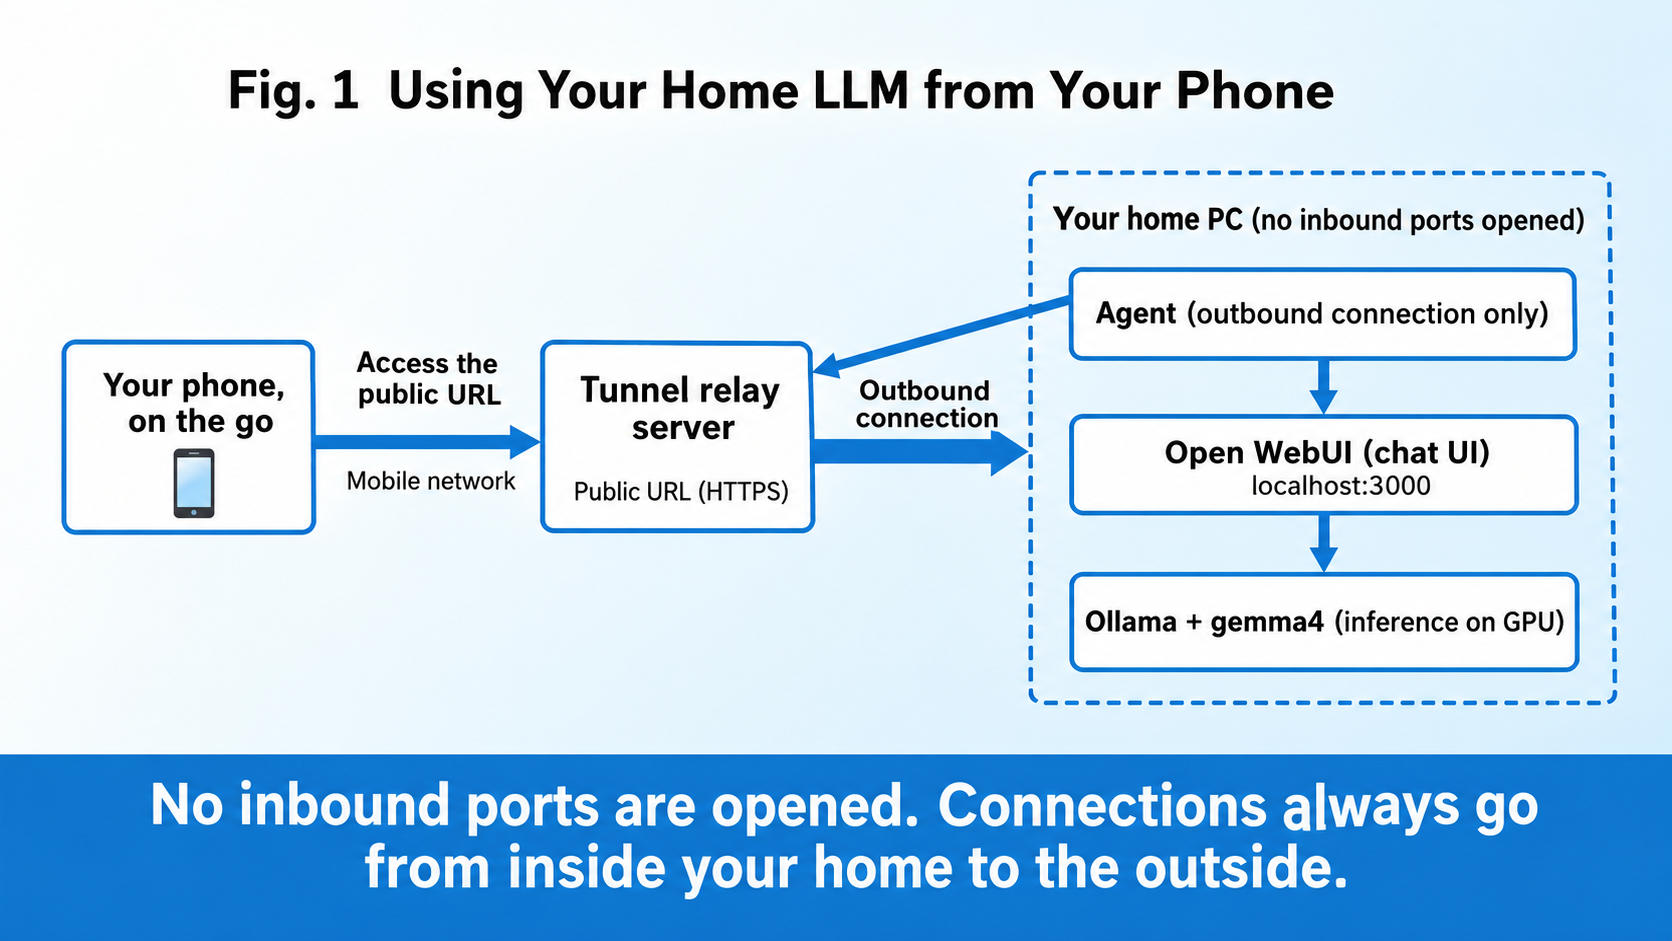
Here is the heart of the matter: making localhost:3000 reachable from your phone while you are out.
There are several ways to expose it.
| Method | Ease | Concerns |
|---|---|---|
| Router port forwarding + DDNS | Lots of configuration | An inbound port at home is permanently exposed |
| VPN (Tailscale, etc.) | Easy | Every device you use needs the app installed |
| Tunnel-based (this article) | Easy | Traffic passes through a relay server |
This time we use the tunnel-based approach.
All communication happens over outbound connections established from the home side to the tunnel provider, sonot a single inbound port at home is opened.
In this article we use WireCanal, a service we develop and operate ourselves. For the use case in this article, the free plan is more than sufficient, and no card registration is required.
There are only three steps.
First, inthe WireCanal dashboard, create a canal (the tunnel's public endpoint). Choose HTTP as the type, specify localhost:3000 as the forwarding target, and a single public URL is issued.
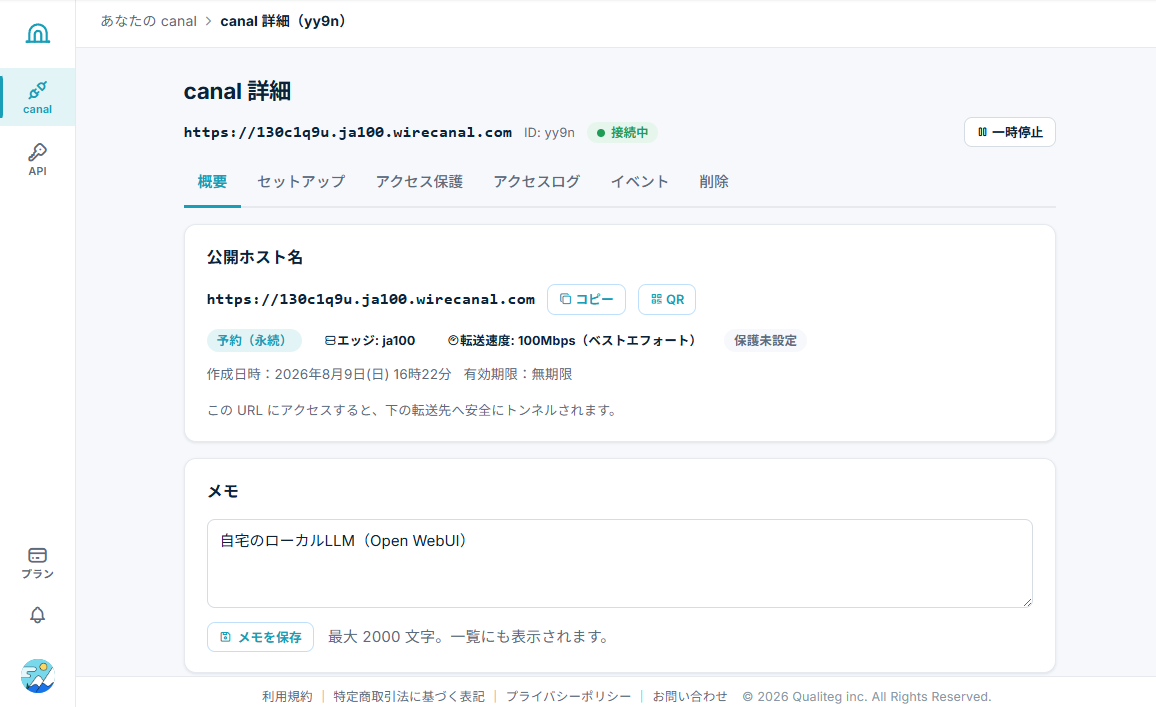
Next, install the Agent on your home PC.As described in the setup guide (wirecanal.com), it is a single line in PowerShell (the Agent version verified was v0.18.0).
irm https://download.wirecanal.com/install.ps1 | iexDownload wirecanal.json (the connection settings) from the dashboard and place it in the same folder as the Agent, and you are ready.
Finally, register the Agent as a Windows service. It works when started manually as well, but as a service it recovers on its own after a PC reboot.
.\wirecanal.exe service install -config wirecanal.jsonwirecanal service install: service "wirecanal-agent" installed (auto start; restarts 5s after a failure)
wirecanal service install: service started.Now, accessing the public URL brings up the login screen of the Open WebUI running at home. Run through the full flow once in a PC browser (log in → ask a question → get a response) to confirm it works before taking it outside.
Step 5: Use It from Your Phone
All that remains is to open the public URL on your phone while out.
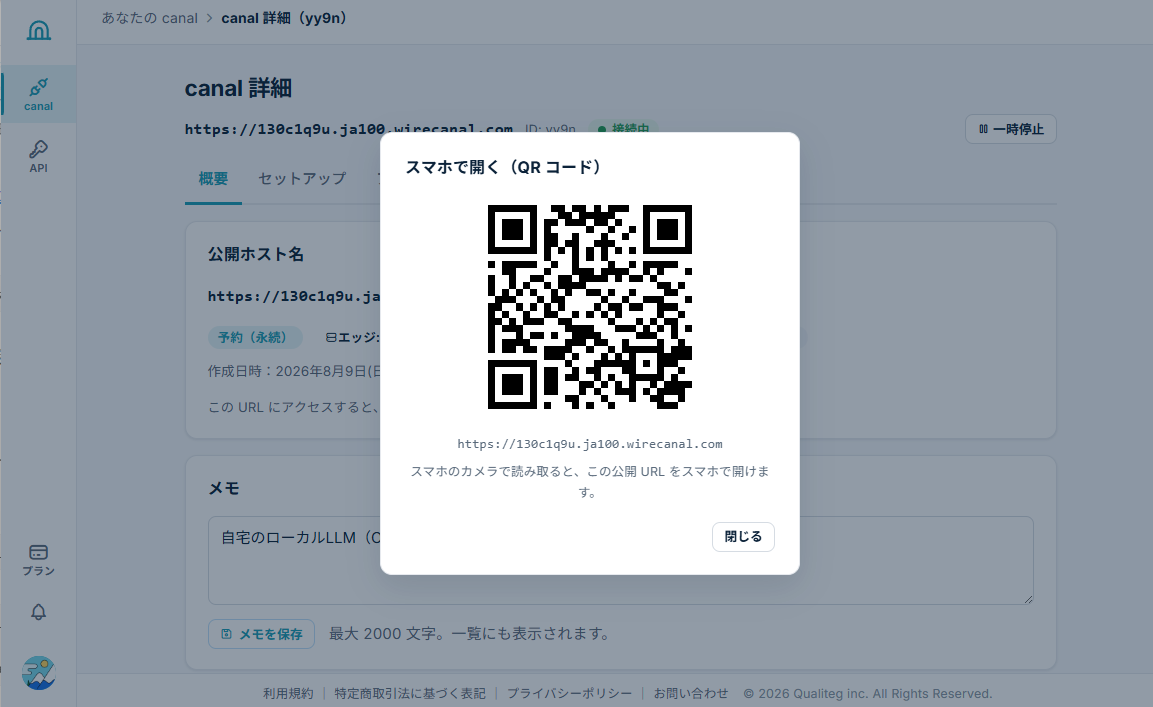
As a convenience, you can display a QR code for the canal's URL on the canal detail screen beforehand and scan it with your phone, saving you from typing the URL
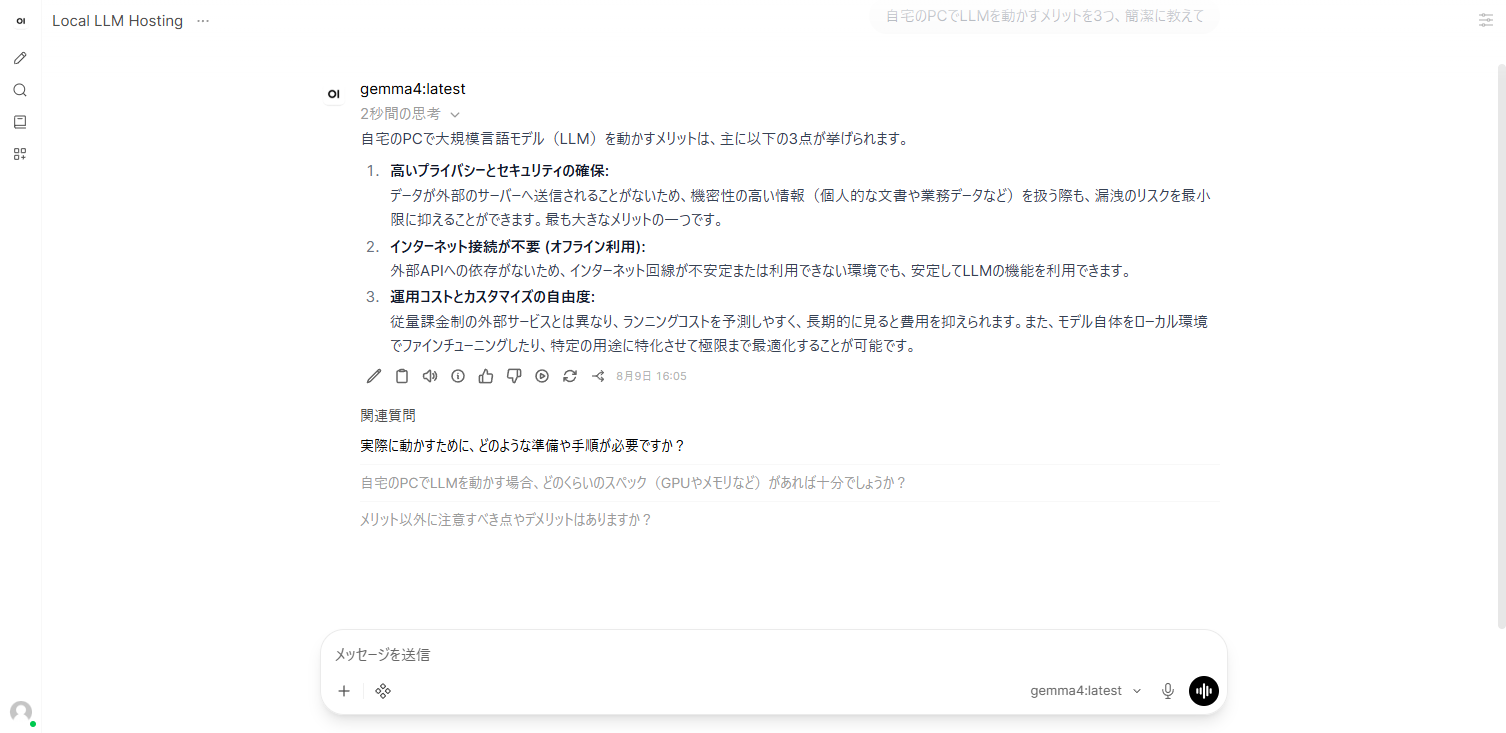
Log in with the account created in Step 3, and the same chat screen you saw on your home PC appears as is.
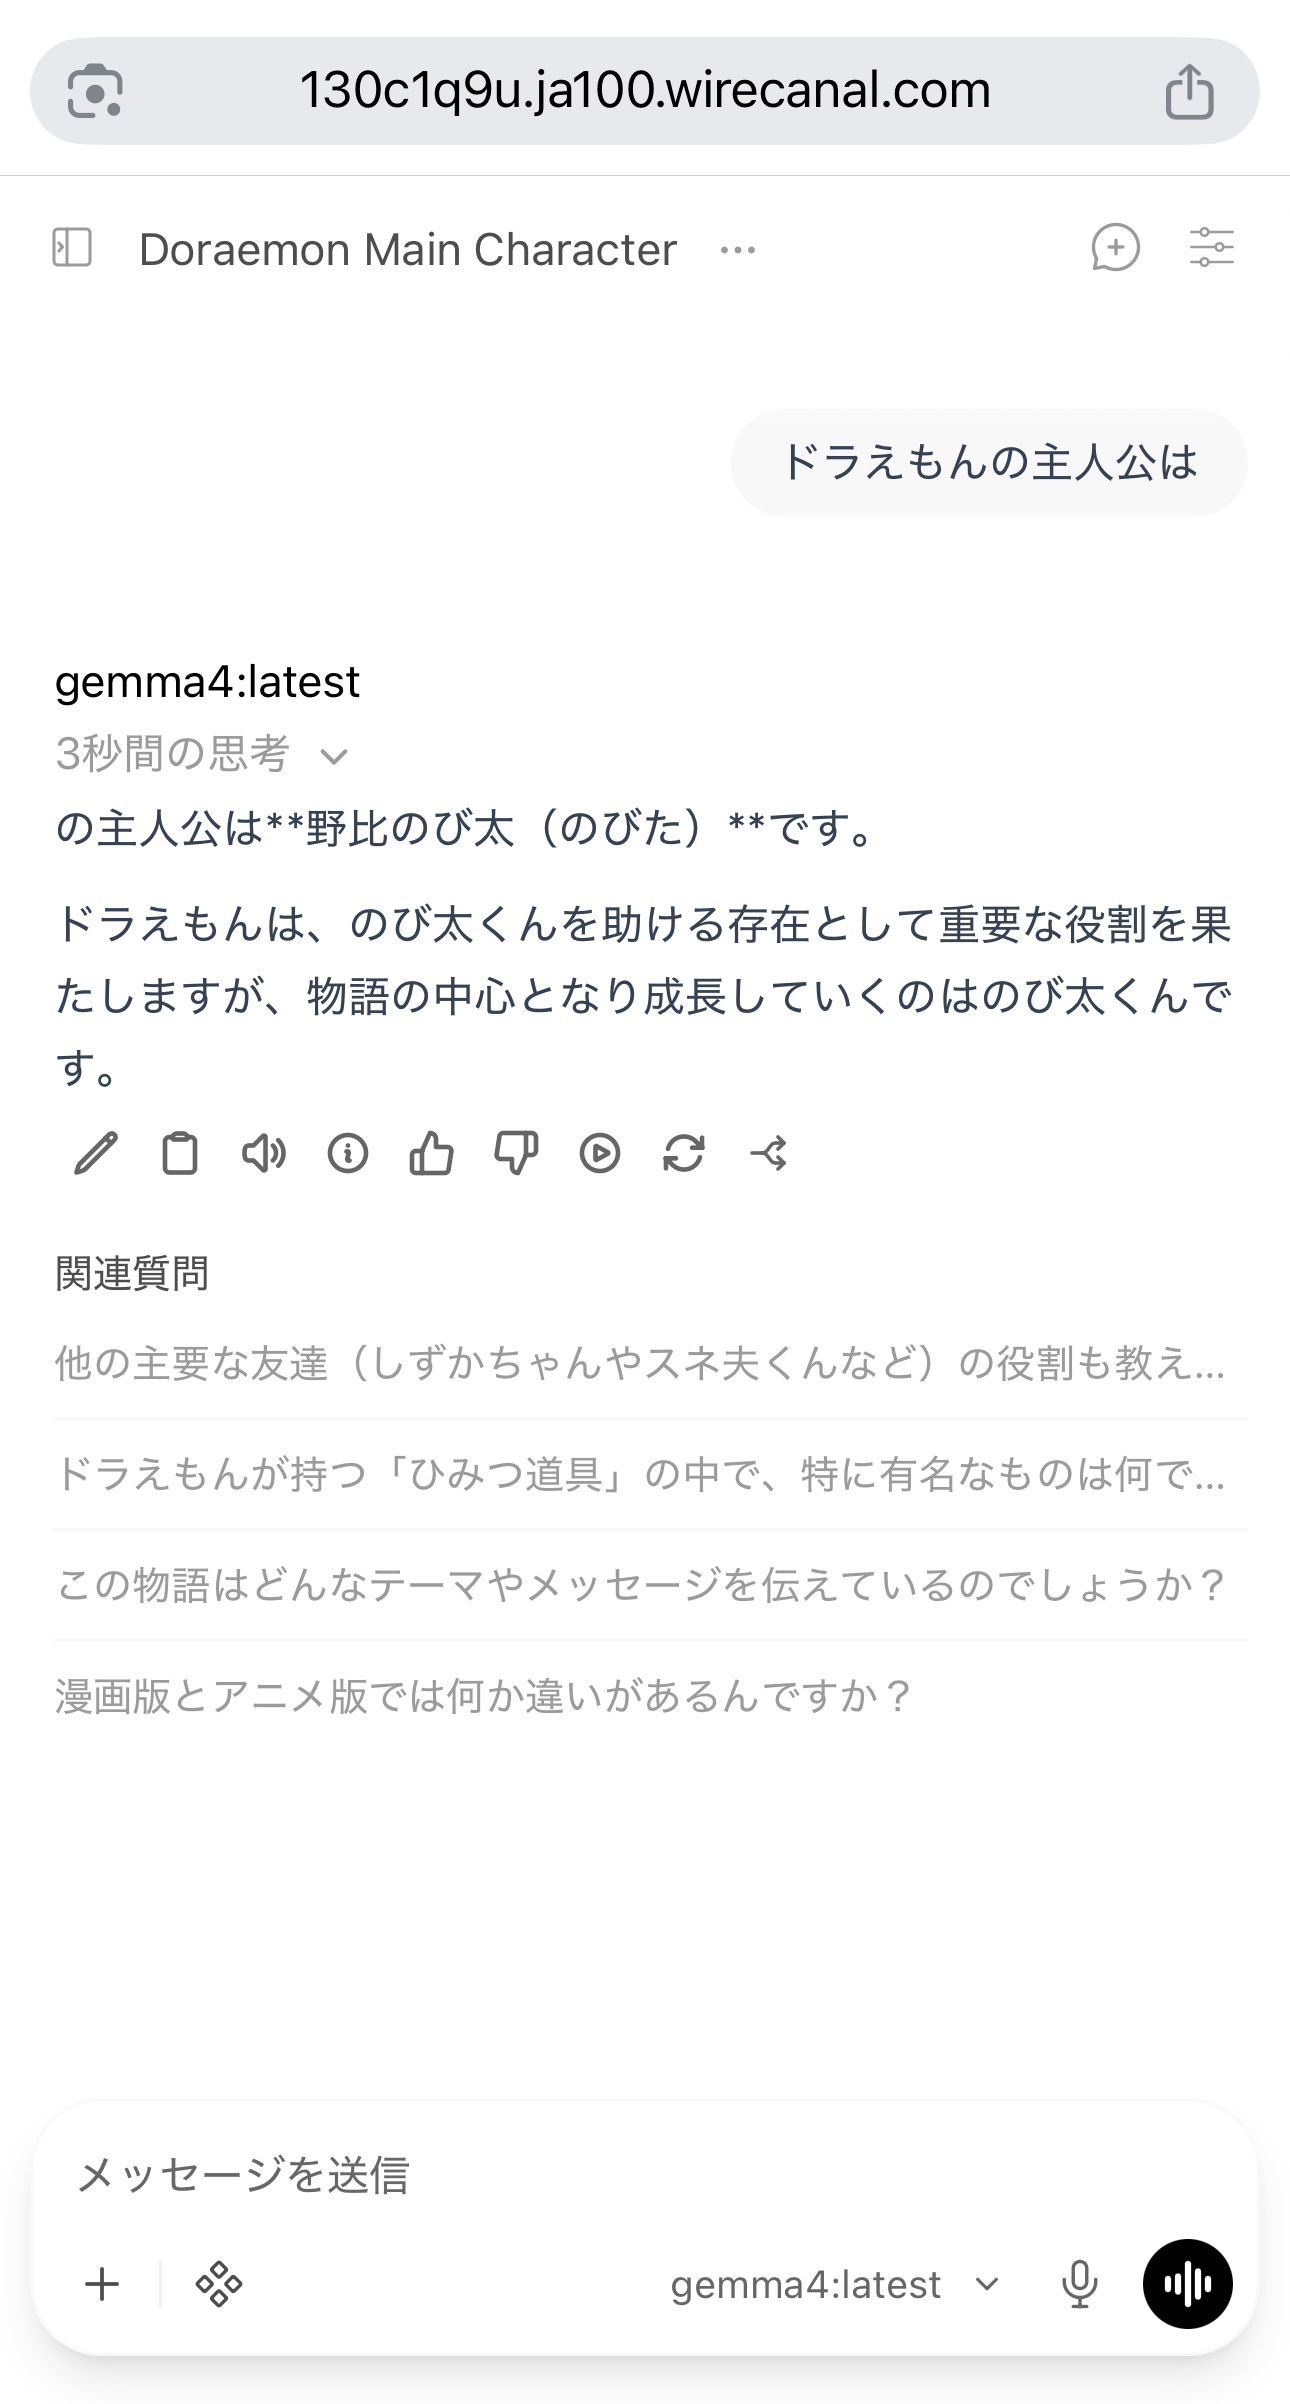
Over a mobile connection, gemma4 running on the RTX 3090 Ti at home answers in Japanese.
The model itself and Open WebUI's conversation history are stored on your home PC (the communication with your phone itself passes through the tunnel's relay server; the public URL is HTTPS).
With that, you can access your own dedicated LLM from wherever you are.
How to Think About Safety When Exposing to the Internet
In this setup, Open WebUI's own login acts as the gatekeeper — as noted in Step 3, complete the administrator registration before publishing. WireCanal also provides access protections such as IP, country, and time-of-day restrictions as standard, so combine them as your use case requires.
A canal can be paused and resumed at any time from a phone browser, so it is also easy to open the line only when you use it and keep the canal stopped otherwise.
Please read this article as one example of a setup for using your machine from outside without opening ports.
Making It Persistent So It Is Always Available
Finally, we make the setup survive PC reboots and re-logons. The Agent was already registered as a service in Step 4, so what remains is Ollama and Open WebUI. Register them as "at startup" tasks in Task Scheduler (run PowerShell as administrator).
$action   = New-ScheduledTaskAction -Execute 'powershell.exe' `
  -Argument '-NoProfile -ExecutionPolicy Bypass -File D:\qualiteg_examples\open-webui\run-open-webui.ps1'
$trigger  = New-ScheduledTaskTrigger -AtStartup
$settings = New-ScheduledTaskSettingsSet -ExecutionTimeLimit ([TimeSpan]::Zero) `
  -RestartCount 5 -RestartInterval (New-TimeSpan -Minutes 1)
Register-ScheduledTask -TaskName 'openwebui-serve' -Action $action -Trigger $trigger `
  -User 'SYSTEM' -RunLevel Highest -Settings $settings
The contents of run-open-webui.ps1 are almost the same as the startup command in Step 3, with one important difference. A task running as SYSTEM does not go through conda activate, soopen-webui must be specified as the absolute path to the executable inside the environment.
$env:OLLAMA_BASE_URL = 'http://localhost:11434'
$env:DATA_DIR = 'D:\qualiteg_examples\open-webui-data'
& 'C:\tools\Anaconda3\envs\openwebui\Scripts\open-webui.exe' serve --port 3000
The key points are disabling the execution time limit (the default cuts tasks off at 72 hours) and running as SYSTEM, decoupled from logons. Create a task of the same shape for Ollama, ollama serve. Specify ollama.exe by absolute path here as well (in the author's environment, C:\Users\<your-username>\AppData\Local\Programs\Ollama\ollama.exe). The regular installer version also sets up auto-start at logon, so disable that auto-start to avoid running two instances.
One more caveat: if a PowerShell script launched from a SYSTEM task contains Japanese comments, it may fail to run due to an encoding mismatch (UTF-8 without BOM being read as ANSI). Write scripts in ASCII only, or save them as UTF-8 with BOM. This cost us another 30 minutes.
Summary: Your Home GPU, Available from Your Pocket
Listing what we did: one installer, one pip install, a tunnel configuration, and a few environment variables. Without any elaborate machinery, your home GPU machine becomes your own dedicated LLM server.
Finally, here are the key points of this setup.
| Key point | Setting |
|---|---|
| Keep the model resident on the GPU | OLLAMA_KEEP_ALIVE=-1 |
| Prevent administrator takeover | Create the first account before publishing |
| Survive reboots | Agent as a service; Ollama / Open WebUI as startup tasks (absolute paths) |
See you next time.
Sources and References
- Ollama official site (download)
- Ollama FAQ (keep_alive behavior)
- Open WebUI official documentation (pip installation and Python requirements)
- WireCanal setup guide (Windows)



