
Hardening a Raspberry Pi 5: SSH keys, UFW, fail2ban — and the trap where IPv6 comes back after a reboot
A freshly set up Raspberry Pi 5 is wide open: password auth enabled, no firewall, 172 pending updates. We harden it with SSH key-only auth, UFW, fail2ban, and automatic updates, disable IPv6, and verify it all with real reboots — including the trap where IPv6 comes back after a reboot.

Hello!
This is the Qualiteg Product Development Team!
In the previous article, we set up a monitor-less Raspberry Pi 5 using only a Windows PC, going from inserting the SD card to an SSH connection in about 3 minutes.
Eventually, this Raspberry Pi will host a small web server that we want to reach from the internet.
But before that, there is something we need to do first.
When we actually measured it, a freshly set up Raspberry Pi OS turned out to be far more exposed than expected
.
Password authentication was still enabled with the simple throwaway password from our previous test setup, there was no firewall, 172 upgradable packages had piled up, and the device had even acquired a global IPv6 address we never intended to have.
In this article, we will
switch SSH to key-based authentication, set up UFW, fail2ban, and automatic updates, disable IPv6 — all with real commands — and then actually reboot the machine to verify that every setting survives
Full disclosure: we stumbled once during this verification.
The IPv6 we had disabled via sysctl came back after a reboot.
The culprit was the NetworkManager connection profile.
We cover that whole story in detail in the second half.
This article targets Raspberry Pi OS (64-bit, based on Debian 13 "trixie").
All work is done from a Windows PC over SSH; the Raspberry Pi never gets a monitor attached. All numbers in this article are actual measurements taken on August 14, 2026.
We measured the initial state — and it was this exposed
Before touching anything, we measured the current state. Instead of "it's probably unsafe," we confirm exactly what is open and how, and then close it.
| Aspect | Initial state (measured) | Why it is a problem |
|---|---|---|
| SSH authentication | Password authentication enabled (with the simple test password set last time) | Target for brute-force attacks |
| Root login | permitrootlogin without-password | Leaves room for direct root login |
| Firewall | None (ufw not installed, 0 nft rules) | Every port passes straight through |
| Brute-force protection | None (fail2ban not installed) | Unlimited login attempts allowed |
| IPv6 | Holds a global address, listening on [::]:22 | A path we never intended to operate remains open |
| Updates | 172 upgradable packages, no automatic updates | Known fixes never get applied |
| Listening ports | 22 and 111 (rpcbind) both listening on 0.0.0.0 (plus port 8080 of the test web server we set up) | Even unused services are exposed |
The IPv6 part may surprise you. Even though we intended LAN-only operation, the device had received router advertisements (RA) and automatically acquired a global IPv6 address starting with 2409:.
Global IPv6 addresses do not assume NAT, so the exposure model is fundamentally different from IPv4.
Since this article's policy is to keep IPv6 out of operation, we explicitly disable it so that no unused path is left behind.
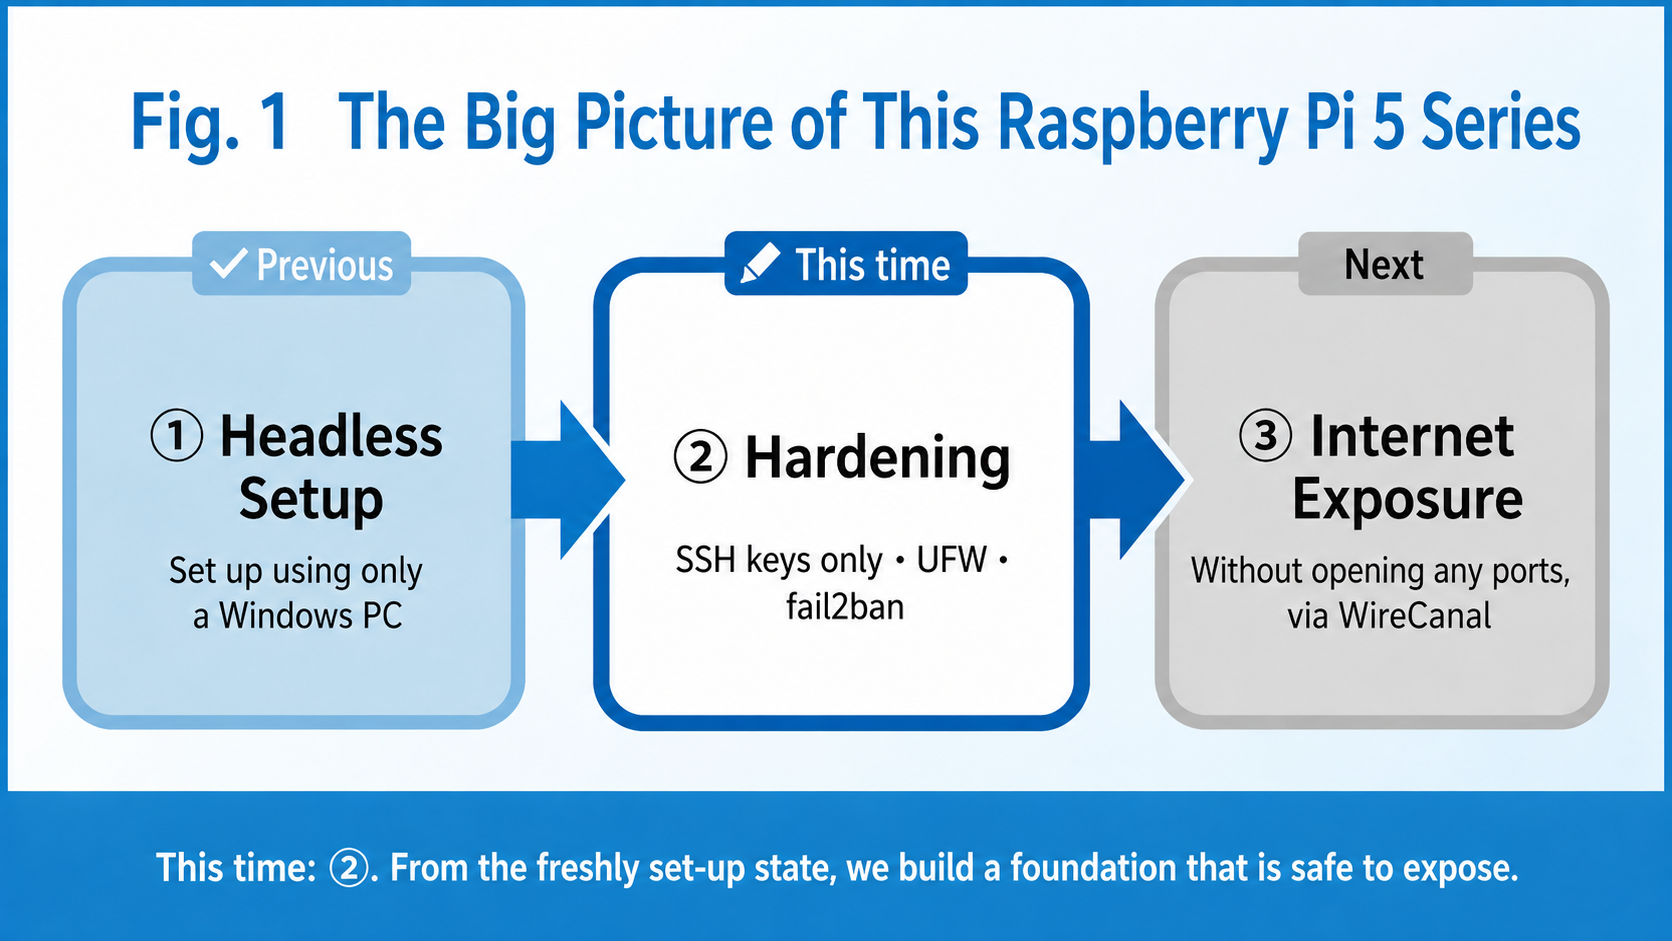
Policy: open no ports — publish through a tunnel
Here is the hardening policy we settled on.
SSH becomes key-authentication only, restricted to connections from our home LAN. As for every other inbound port, including 8080 for the web server, we open none at all。
"We want to use it from outside but won't open any ports" may sound contradictory, but publishing will happen next time through a WireCanal tunnel. With a tunnel, the Raspberry Pi only needs outbound connections — no inbound ports to open, no router port forwarding required.
In other words, this round of hardening means "close everything」、
and next time's publishing means "reach the outside while staying closed." That is the division of labor.
Step 1: Install the SSH key (the do-not-lock-yourself-out order is everything)
First, we install the key. There is one iron rule here.Verify that key-based login actually succeeds before turning off password authentication. Get the order wrong and you lock yourself out of SSH. On a monitor-less Raspberry Pi, recovering while staying headless is quite painful, so this order must never be broken.
If you do not have an SSH key yet, first run ssh-keygen -t ed25519 on the Windows side to create one.
We recommend setting the passphrase you are asked for along the way (it is your insurance if the key file ever leaks). You can get the public key with %USERPROFILE%\.ssh\id_ed25519.pub.
First, place the public key on the Raspberry Pi.
# On the Raspberry Pi (run as the pi user)
D=/home/pi/.ssh
mkdir -p "$D"; chmod 700 "$D"
cat > "$D/authorized_keys" <<'EOF'
ssh-ed25519 AAAA...(your public key)
EOF
chmod 600 "$D/authorized_keys"; chown -R pi:pi "$D"
Note that cat > overwrites the existing authorized_keys entirely. We write it this way because this is a brand-new build; on a machine that already has registered keys, append instead (>>).
If you use GitHub, https://github.com/<your-account>.keys returns the list of your public keys, so copying from there is the quickest way.
Once the key is in place, confirm from the Windows side that you can log in with the key alone.
ssh -o PasswordAuthentication=no pi@192.168.12.17Only proceed once this goes through.
Step 2: Change the password, disable IPv6, and make SSH key-only
From here on we work with root privileges (either enter with sudo -i or prefix each command with sudo). First, change the password — from the simple test password of last time to a proper one. Even after going key-only, sudo still uses the password, so we sort it out here.
passwd piNext, disable IPv6 on the OS side.
cat > /etc/sysctl.d/99-disable-ipv6.conf <<'EOF'
net.ipv6.conf.all.disable_ipv6 = 1
net.ipv6.conf.default.disable_ipv6 = 1
net.ipv6.conf.lo.disable_ipv6 = 1
EOF
sysctl --system
Then we harden SSH. Rather than editing the main config file, we add a drop-in.
cat > /etc/ssh/sshd_config.d/00-hardening.conf <<'EOF'
PasswordAuthentication no
KbdInteractiveAuthentication no
PermitRootLogin no
AddressFamily inet
EOF
sshd -t && systemctl restart ssh
AddressFamily inet tells sshd to listen on IPv4 only. On Ubuntu, sshd is sometimes activated via a socket (ssh.socket), which needs its own drop-in as well — but on our machine ssh was started directly as a service (ssh.socket was disabled), so the sshd_config setting alone made [::]:22 disappear (measured).
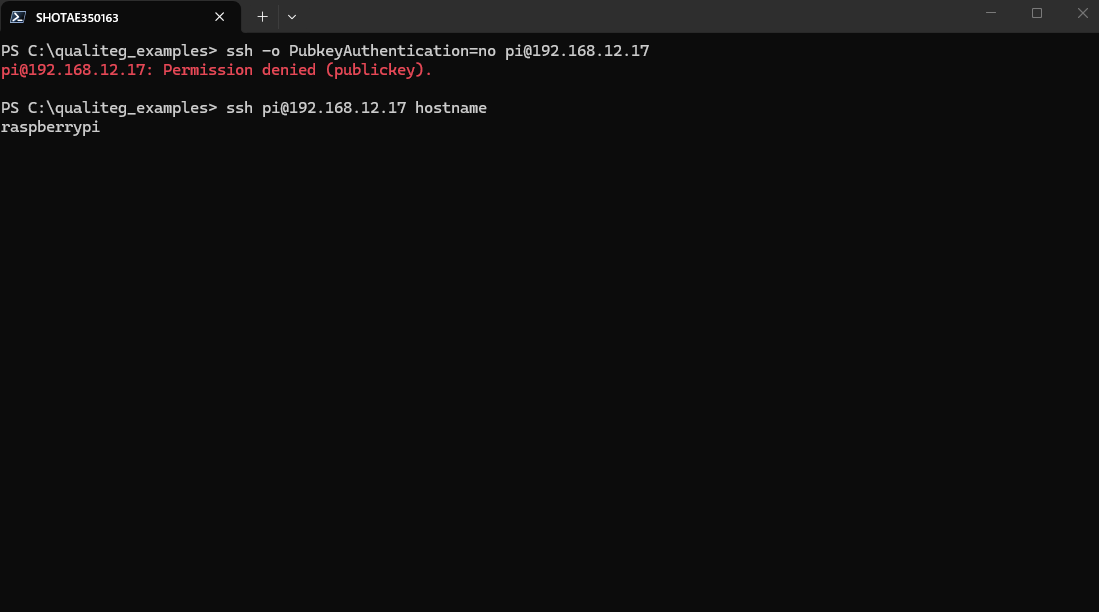
At this point, try password authentication from a separate terminal. If it gets rejected, you succeeded. Do not forget to also confirm that your existing key login still works.
Step 3: Apply the 172 pending updates, then fail2ban and automatic updates
export DEBIAN_FRONTEND=noninteractive
apt-get update -q
apt-get -y -q full-upgrade          # apply all 172 pending updates
apt-get -y -q install ufw fail2ban unattended-upgrades
fail2ban is the gatekeeper that counts failed SSH attempts and bans the offenders automatically. One thing worth knowing: our Raspberry Pi OS trixie machine has no rsyslog installed and /var/log/auth.log does not exist either.
That means sshd logs are read from journald. Debian's fail2ban package ships a setting that reads journald for sshd (sshd_backend = systemd), but many older guides assume auth.log, so we also declared the backend explicitly in our jail config.
cat > /etc/fail2ban/jail.d/sshd.local <<'EOF'
[sshd]
enabled = true
backend = systemd
maxretry = 5
bantime = 1h
EOF
systemctl enable --now fail2ban
We also set up automatic updates (unattended-upgrades).
We do not want surprise reboots in the middle of the night, so we turn off automatic reboots only. Note that the actual periodic execution is driven by APT-side timers (apt-daily.timer / apt-daily-upgrade.timer), so our verification includes confirming that those timers are enabled.
cat > /etc/apt/apt.conf.d/20auto-upgrades <<'EOF'
APT::Periodic::Update-Package-Lists "1";
APT::Periodic::Unattended-Upgrade "1";
EOF
cat > /etc/apt/apt.conf.d/52unattended-upgrades-local <<'EOF'
Unattended-Upgrade::Automatic-Reboot "false";
EOF
systemctl enable --now unattended-upgrades
One interesting discovery came as a side effect of full-upgrade.
Our machine initially had /etc/sudoers.d/010_pi-nopasswd, which let sudo run without a password — but
after full-upgrade this file was gone and sudo started requiring a password
(this is what we measured in our environment, not something we verified as an official behavioral change). Since it moves in the right direction for hardening, we simply kept it.
Step 4: With UFW, add the allow rules first, then enable
The scary part of a firewall is locking yourself out. UFW is disabled right after installation, so setting the default policies does not start blocking anything by itself.
The dangerous move is running ufw enable without first adding an allow rule for SSH.
That is why we add the allow rules first and enable afterwards.
ufw default deny incoming
ufw default allow outgoing
ufw allow from 192.168.12.0/24 to any port 22 proto tcp   # match your home LAN segment
ufw --force enable
Inbound traffic is denied by default, and the only user-defined allow rule is SSH (22) from the home LAN. We deliberately do not allow port 8080 of the test web server either (next time, that is exactly what we will publish through the tunnel). After enabling, keep your current SSH session open and confirm that a brand-new SSH connection from another terminal still works.
Verification: every item, actually measured
With the configuration written, it is time to verify. Not "the config file says so, so it must be fine" — we check the actual behavior from the outside.
| Verification item | Measured result |
|---|---|
| Key login | Success |
| Password authentication | Rejected (Permission denied (publickey)) |
| Effective sshd config (sshd -T) | passwordauthentication no / permitrootlogin no / addressfamily inet |
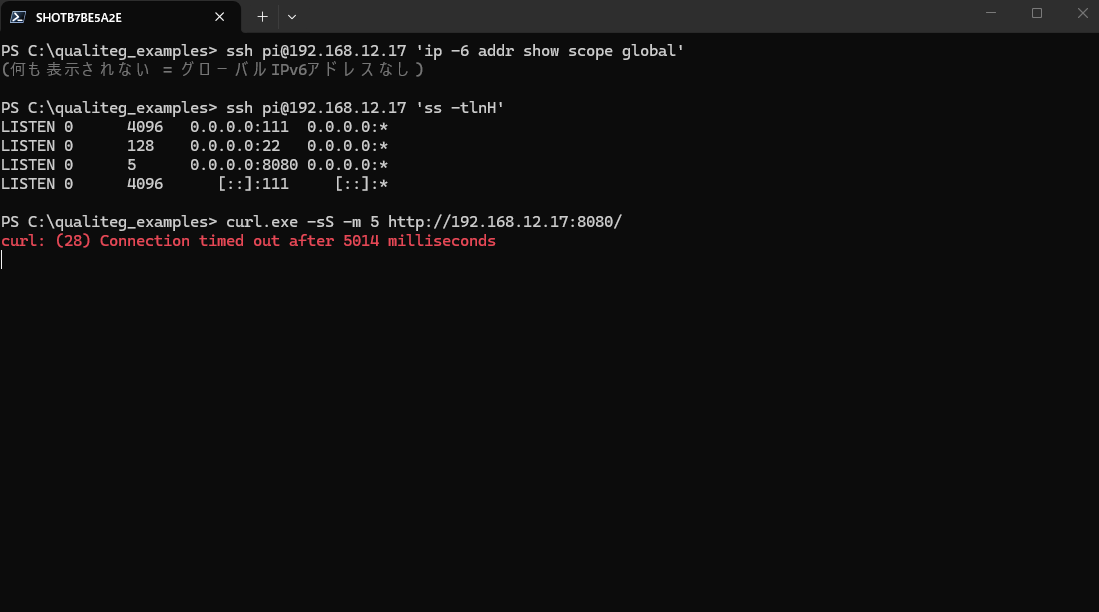
| Listening on [::]:22 | Gone (confirmed with ss -tlnH) |
| Global IPv6 address | None (ip -6 addr show scope global is empty) |
| UFW | active, deny incoming, only the LAN-restricted allow rule for 22/tcp |
| External port check | From the dev machine: TCP 22 = reachable, TCP 8080 = blocked |
| fail2ban | sshd jail running (watching journald) |
| Automatic updates | apt-daily.timer and apt-daily-upgrade.timer both enabled, next runs scheduled, Automatic-Reboot false |
| Upgradable packages | 172 → 0 |
So far so good. The problem came next.
After a reboot, IPv6 was back
You can only prove persistence by actually rebooting. In the first reboot verification, SSH came back about 21 seconds after the reboot, and both UFW and fail2ban started automatically. And yet:
ip -6 addr show scope global
# → 2409:xx:xxxx:... is still there
The global IPv6 address we had removed was back.
The cause was NetworkManager. IPv6 was still enabled in the connection profile, so even with the sysctl disable_ipv6 applied,
the per-interface disable_ipv6 was being written back to 0 the moment the Wi-Fi connection came up (as observed in our environment).
Right after applying the setting, ip -6 addr comes back empty, so it looks like a success. But once you reboot and Wi-Fi reconnects, the setting gets rolled back. This behavior only surfaced during the first reboot verification.
To make it permanent, disable IPv6 in the NetworkManager connection profile itself.
# Check the profile name (on our machine it was called "preconfigured")
nmcli connection show --active

# Disable IPv6 on the profile side
nmcli connection modify "<the connection name from above>" ipv6.method "disabled"
With this in place we ran a second reboot verification, and this time the machine kept zero global addresses after the reboot.
The real lesson here is not about how to disable IPv6 — it is this:
"I applied the setting and checked it on the spot" guarantees nothing about persistence. Only when verification includes a reboot is the work actually done.
Our rule is that if even one verification item fails, the whole task is treated as incomplete — fix it and verify again. Thanks to that discipline, we caught the "setting I thought I disabled was silently restored after reboot" state before going public.
Differences from older guides, confirmed on this trixie machine
With the move to a Debian 13 trixie base, several assumptions from long-standing guides no longer held.
Here is a summary of what we could confirm on our machine.
| Old assumption | Reality on this trixie machine |
|---|---|
| fail2ban reads /var/log/auth.log | No rsyslog, and auth.log does not exist. sshd logs are read from journald (the Debian package already sets sshd_backend = systemd) |
| The pi user's sudo is NOPASSWD | full-upgrade removed 010_pi-nopasswd and sudo now requires a password (measured in our environment) |
| Killing [::]:22 requires an ssh.socket drop-in (Ubuntu family) | Our machine starts the service directly, so AddressFamily inet alone was enough |
Summary
Right after setup, our Raspberry Pi 5 had password authentication enabled with a simple test password, no firewall, 172 upgradable packages, and an unintended IPv6 address.
After this session's work, SSH is key-only and LAN-restricted, UFW denies inbound traffic by default with SSH from the home LAN as the only explicit allow rule, and updates covered by unattended-upgrades are applied automatically.
Everything was done over SSH; a monitor was never connected even once.
The biggest takeaway: we caught the phenomenon of NetworkManager writing back over sysctl's IPv6 disablement — through an actual reboot verification. If we had closed the task after only checking right after applying the setting, we would not have noticed the rollback until after going live.
Next time, we will finally take the web server on this Raspberry Pi and make it reachable from the internet without opening a single inbound port, using WireCanal.
See you in the next article!
Sources & References
- Raspberry Pi Documentation | Configuration (official documentation)
- fail2ban official repository (GitHub)
- UFW - Community Help Wiki (official Ubuntu wiki)
- NetworkManager official documentation (freedesktop.org)



