
Publishing a Raspberry Pi 5 Web Server to the Internet: No Open Ports, Just a WireCanal Tunnel
We publish a Raspberry Pi 5 web server to the internet with its inbound ports kept closed: install the WireCanal Agent with a one-liner, create a canal, and run it as a systemd service. No port forwarding or router settings, about 5 minutes of work, verified through automatic recovery after reboot.

Hello! This is the Qualiteg Product Development Team!
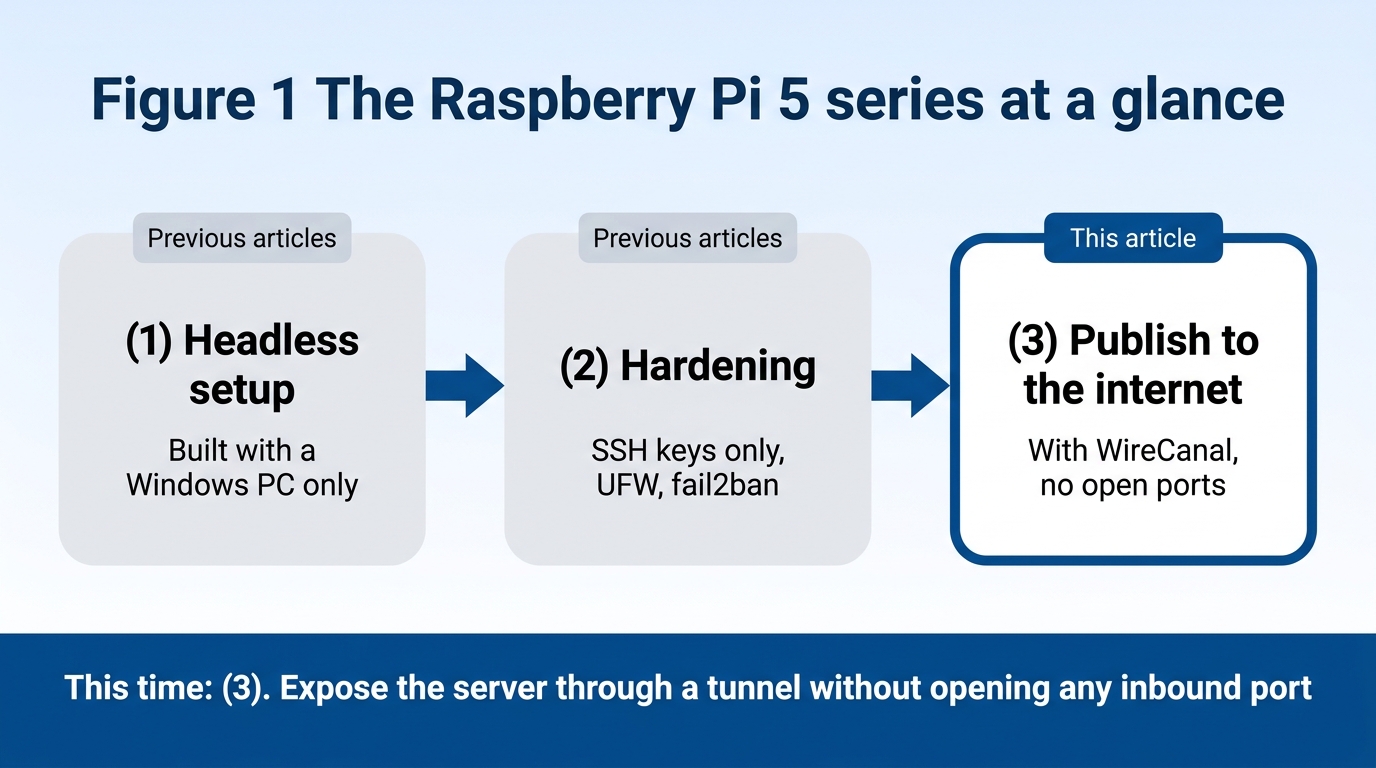
This is the third installment of our Raspberry Pi 5 series.
Part 1 covered the monitor-less setup, and Part 2 covered hardening. In Part 2 we set UFW to deny inbound traffic by default and explicitly allowed only SSH from the home LAN.
A web server is running on the Pi, yet port 8080 is unreachable not only from outside but even from within the LAN.
This time we make that web server on the Raspberry Pi reachable from the internet. However,
we will not open any additional inbound port for publishing, and we will not do any port forwarding on the router. What we use instead is our tunnel service, WireCanal. For this use case, it is free.
To give away the result first: from installing the Agent to seeing the page at a public URL took about 5 minutes measured, and about 10 minutes including making it a systemd service.
This article walks through the whole procedure from start to finish, with actual screens and measured values. We verify all the way to the point where the public site comes back on its own after a reboot.
The target is Raspberry Pi OS (64-bit, based on Debian 13 trixie). WireCanal is a service developed and operated by Qualiteg, and it can be used from the free plan (0 yen) without registering a credit card. The figures in this article were measured on August 14, 2026.
How can you publish without opening a port?
Normally, publishing a home server means opening a port on the router (port forwarding). But that creates an entry point from the outside into your home, so after all the work of locking down inbound traffic in Part 2, you would now be punching a hole in the router. On top of that, if your global IP address changes and you want to keep reaching the server by the same name, you also need something like DDNS. And on some apartment-building connections, port forwarding is simply not possible.
The tunnel approach works in the opposite direction. The Agent inside the Raspberry Pi connects outbound to the WireCanal relay server. Access from the outside is received by the relay server and delivered to the Pi through that already-established connection. Because no entry point is created on the home side, there is no port forwarding and no router configuration. UFW's "deny inbound by default" stays exactly as it is.
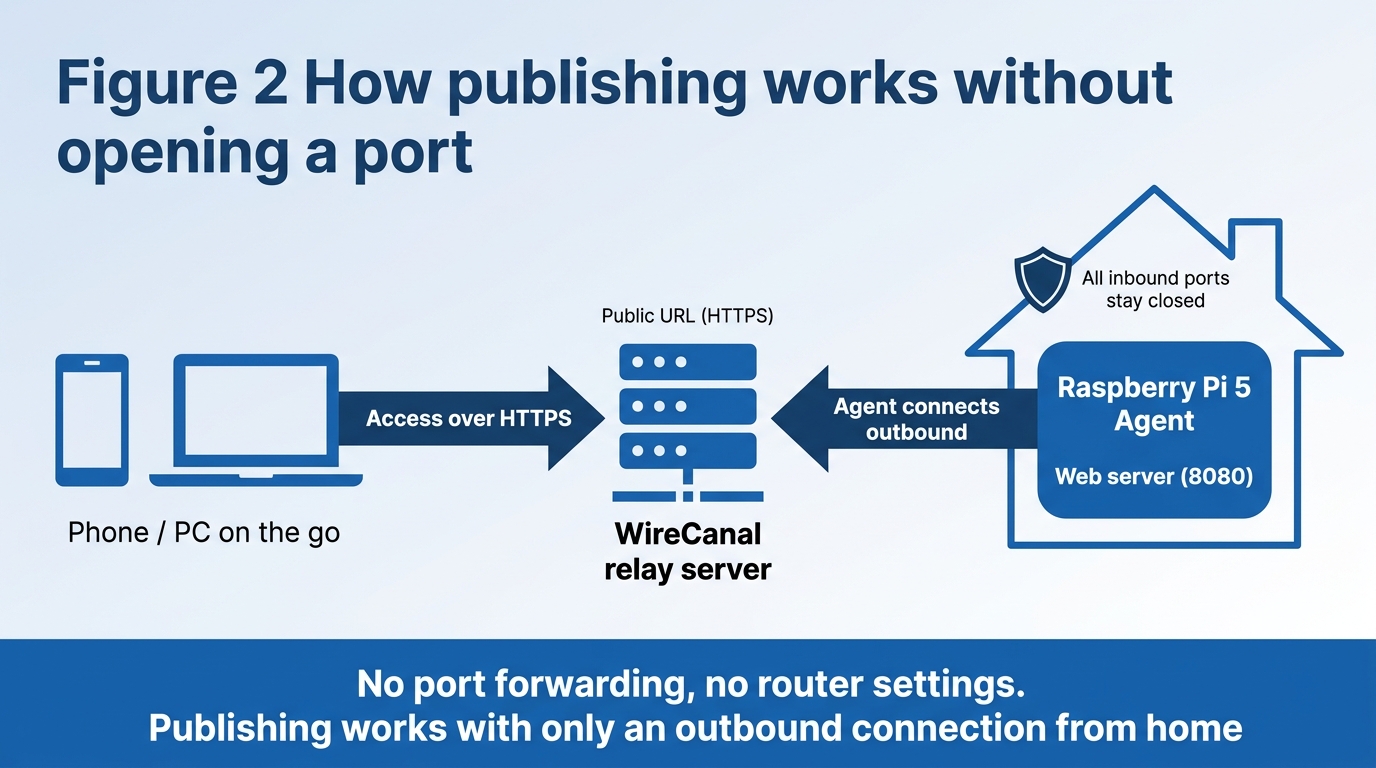
Part 2's "deny inbound by default" and this article's "add no inbound port for publishing" coexist thanks to this mechanism.
What you need
On the Raspberry Pi side, everything is left exactly as it was after the previous articles. A small status-display web server (built with the Python standard library, port 8080) is running as a systemd service.
On the WireCanal side, all you need is an account. Everything in this article can be tried on the free plan (0 yen, no card required). Note that the free plan has a data transfer guideline of about 10 GB per month, and speeds may be reduced after that. One more thing: the auto-assigned subdomain on the free plan stays valid as long as the Agent is in use, but it expires 72 hours after the Agent's last connection. If you want to keep the same URL through long periods of downtime, you need the Lite plan or above, which come with a persistent URL. If you keep the Agent running as a service, as we do here, the URL is retained even on the free plan.
Step 1: Install the Agent on the Raspberry Pi
SSH into the Raspberry Pi and run the one-liner in the directory where you want to place the Agent.
mkdir -p ~/wirecanal && cd ~/wirecanal
curl -fsSL https://download.wirecanal.com/install.sh | sh
Here is the output. The CPU architecture (arm64 for the Raspberry Pi 5) is detected automatically.
Downloading WireCanal Agent v.0.18.1...
wirecanal v.0.18.1 powered by Qualiteg Inc. https://qualiteg.com

Installation complete: /home/pi/wirecanal/wirecanal
Next steps:
  1. Download wirecanal.json from the canal details page in the dashboard
     (https://app.wirecanal.com) and place it in the same folder as wirecanal
  2. Start: ./wirecanal -config wirecanal.json
It finishes after automatically confirming the version. The Agent is a single binary; there is nothing else to install.
Step 2: Create a canal (a 4-step wizard)
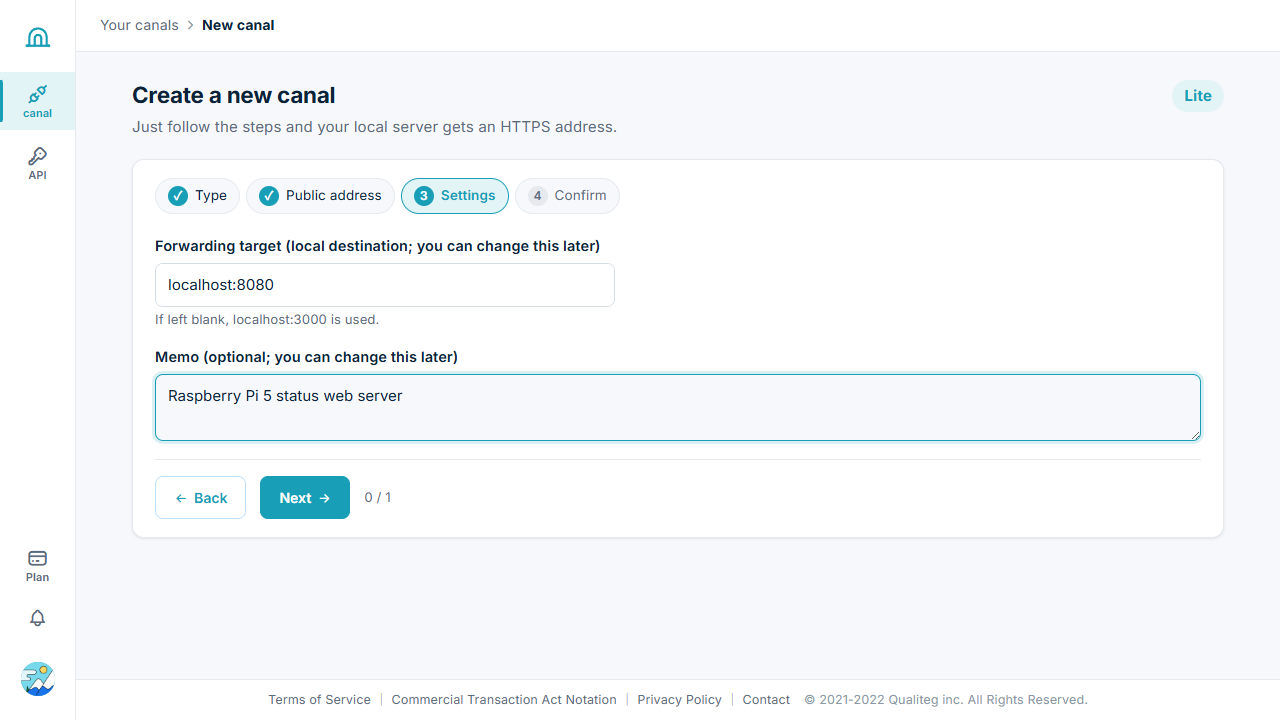
In WireCanal, a pair of a public URL and a forward target is called a canal.From the dashboard, click "Create a new canal" and go through the wizard. For the type, choose "HTTP". This is the mode that publishes a web server over HTTPS.
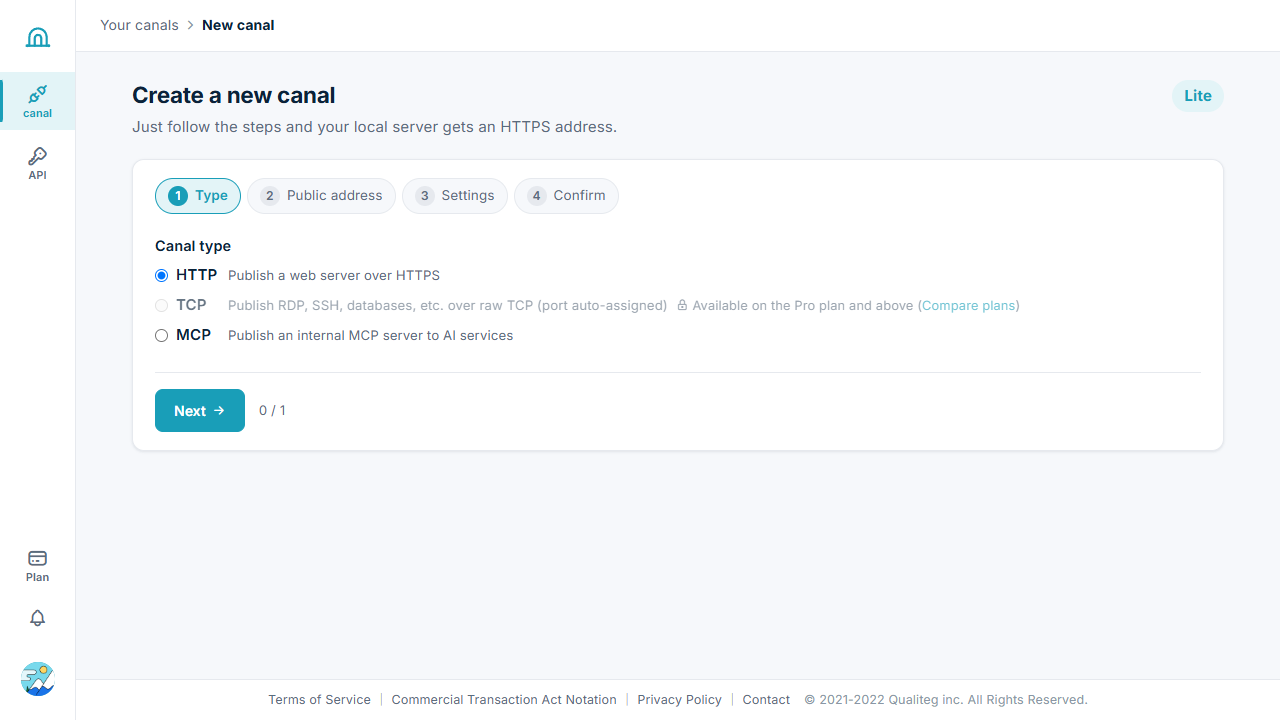
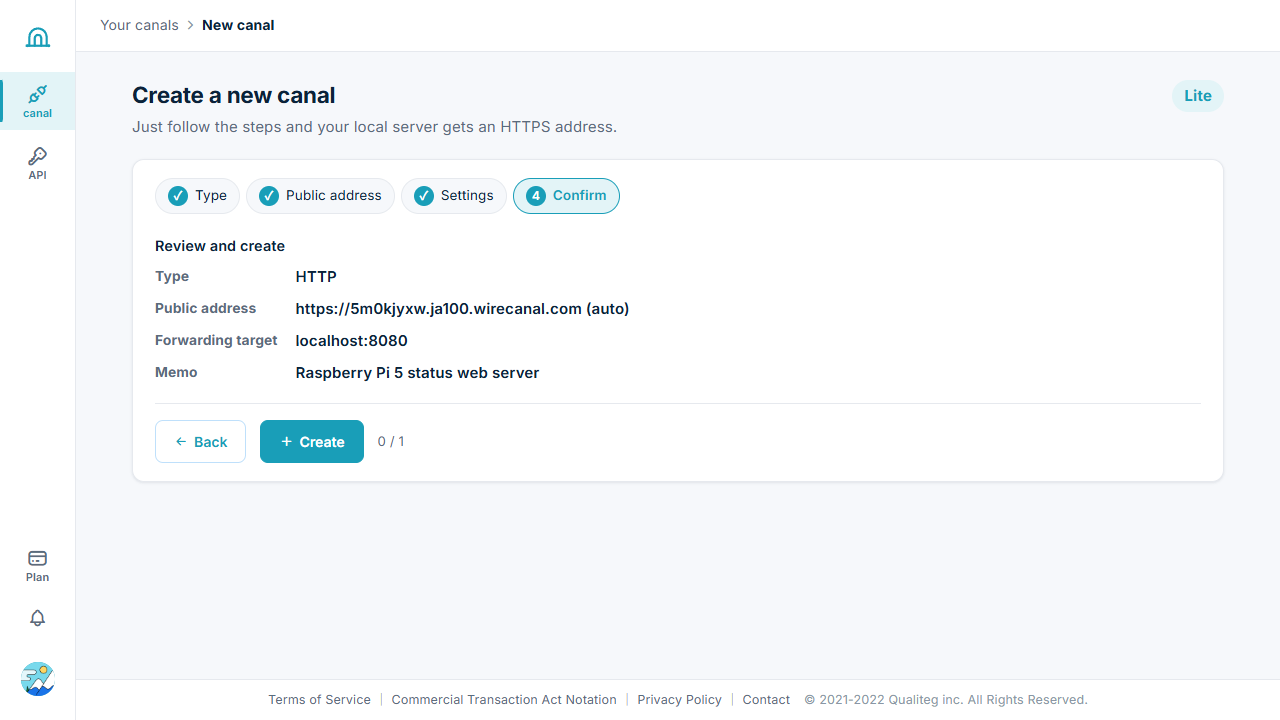
For the public address we chose "auto-assigned subdomain". A random name is issued immediately and is available on every plan. On the next settings screen, enter localhost:8080 as the forward target. That is the port the web server is listening on inside the Raspberry Pi. The memo is optional, but we recommend writing one so you can tell canals apart in the list later.
Press "Create" on the confirmation screen, and a public URL and a connection key (access_key) are issued. The URL issued this time was https://5m0kjyxw.ja100.wirecanal.com.
Step 3: Place wirecanal.json and start the Agent
The canal details screen shows the connection file (wirecanal.json). Download it and place it in the same folder as the Agent on the Raspberry Pi. The screen also shows the setup steps, with a tab for Linux.
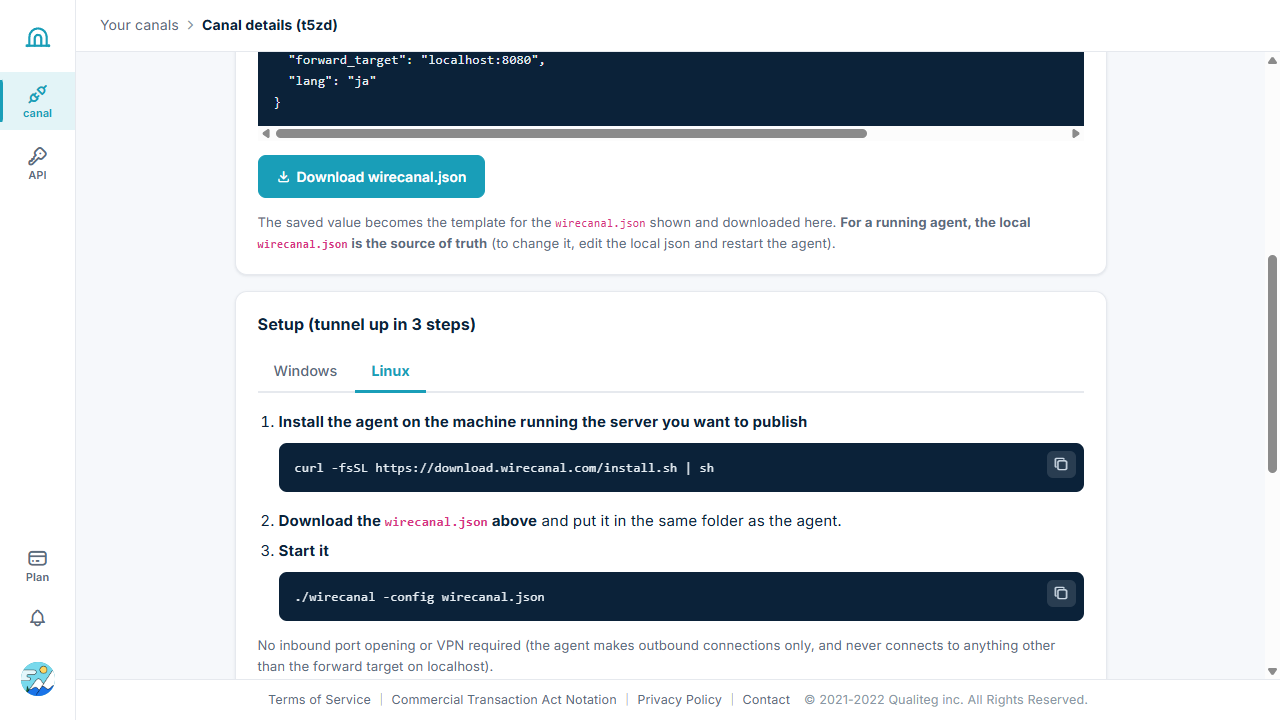
Since this series is about headless operation from Windows, we send the downloaded file to the Raspberry Pi with scp (the SSH key set up in Part 2 works as is).
# On Windows (PowerShell)
scp "$env:USERPROFILE\Downloads\wirecanal.json" pi@192.168.12.17:/home/pi/wirecanal/
wirecanal.json contains the connection key (access_key) dedicated to this canal. Tighten its permissions on the Raspberry Pi before starting.
cd ~/wirecanal
chmod 600 wirecanal.json
./wirecanal -config wirecanal.json
wirecanal v.0.18.1 powered by Qualiteg Inc. https://qualiteg.com
wirecanal: canal t5zd: delivering access to https://5m0kjyxw.ja100.wirecanal.com to the local forward target localhost:8080
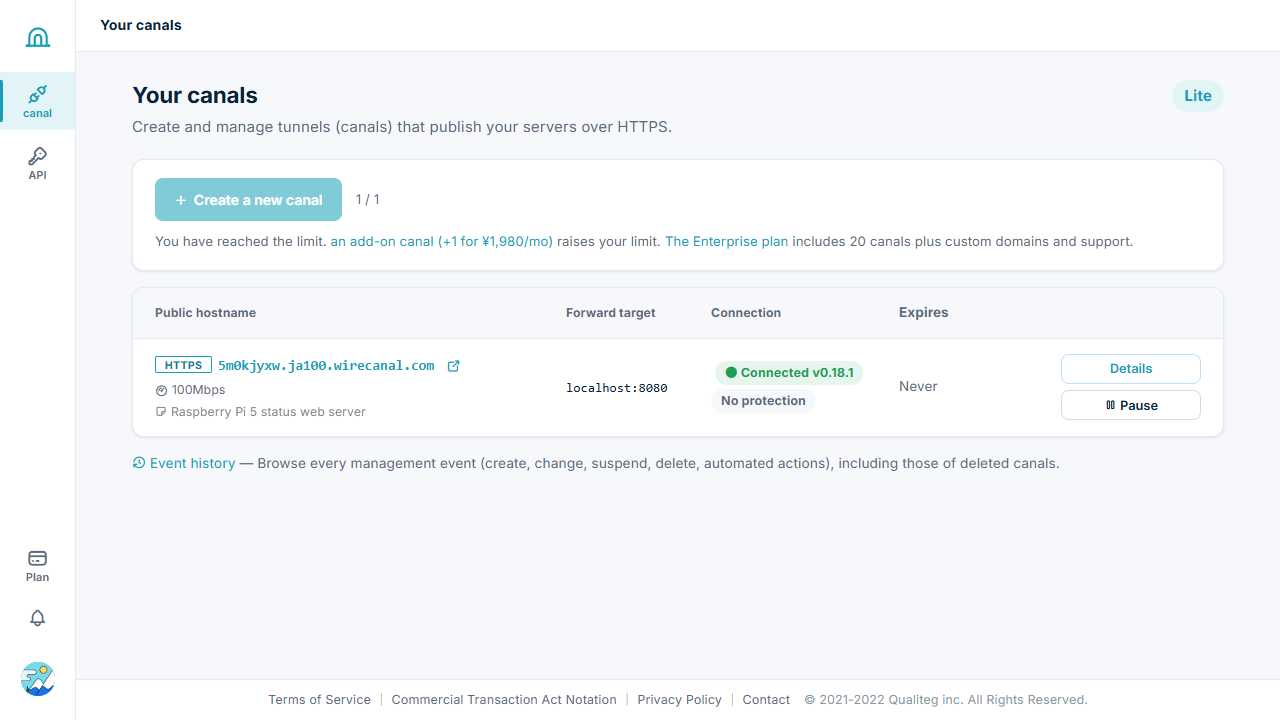
wirecanal 0.18.1: connecting tenant=t5zd mode=http forward_target=localhost:8080At this point the connection status in the dashboard changes to "● Connected", and the tunnel is up.
Step 4: Run it as a systemd service
The Agent started in Step 3 stops when you close the terminal. Since this is a server, we run the Agent as a systemd service, just like the web server.Following the template in the Linux setup guide's service setup steps, we place it under /opt/wirecanal and run it as a dedicated user.
sudo mkdir -p /opt/wirecanal
sudo cp ~/wirecanal/wirecanal ~/wirecanal/wirecanal.json /opt/wirecanal/

sudo tee /etc/systemd/system/wirecanal.service > /dev/null <<'EOF'
[Unit]
Description=WireCanal Agent
After=network-online.target
Wants=network-online.target

[Service]
User=wirecanal
WorkingDirectory=/opt/wirecanal
ExecStart=/opt/wirecanal/wirecanal -config /opt/wirecanal/wirecanal.json
Restart=always
RestartSec=5

[Install]
WantedBy=multi-user.target
EOF

sudo useradd --system --home /opt/wirecanal --shell /usr/sbin/nologin wirecanal
sudo chown -R wirecanal: /opt/wirecanal
sudo chmod 600 /opt/wirecanal/wirecanal.json
sudo systemctl daemon-reload
sudo systemctl enable --now wirecanal
systemctl status wirecanal --no-pager
Restart=always means that if the Agent process exits, it is restarted automatically after 5 seconds (an explicit stop such as systemctl stop is excluded). Logs can be followed with journalctl -u wirecanal -f.
Looking at it from the internet
Open the public URL in a browser.
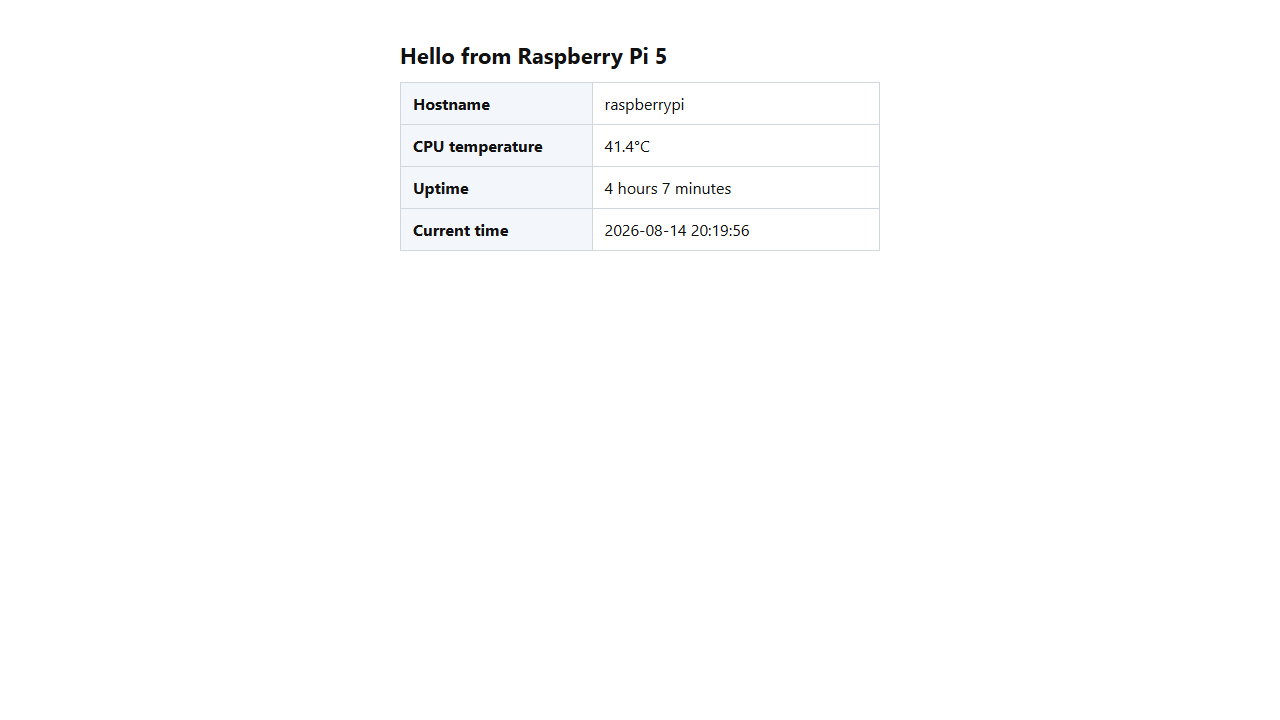
The Raspberry Pi's status page appeared as is. The CPU temperature and uptime are live values. Here is what curl measured.
$ curl -s -o /dev/null -w "HTTP %{http_code} / %{time_total}s" https://5m0kjyxw.ja100.wirecanal.com/
HTTP 200 / 0.18s
Meanwhile, the inbound ports on the Raspberry Pi are still exactly as configured by UFW in Part 2 (deny inbound by default, SSH allowed only from the LAN). Port 8080 remains closed both from outside and from the LAN; publishing is achieved solely through the Agent's outbound connection.
Note that anyone who knows the URL can view the page, so if you want to limit who can see it, configure the canal's access protection (IP restriction, authentication, and so on). Since this is a harmless status page, we left it open.
Does the public site come back on its own after a reboot?
Part 2 taught us that "applying a setting and checking it once does not guarantee persistence." So this time, too, we actually rebooted and verified.
| Check item | Measured result |
|---|---|
| SSH recovery | Back unattended 16 seconds after issuing the reboot (key-only) |
| Web server (raspi-web) | Started automatically |
| Agent (wirecanal) | Started automatically |
| UFW and fail2ban | Started automatically |
| Global IPv6 addresses | Still zero (the permanent fix from Part 2 is holding) |
| Public URL | Came back automatically with HTTP 200 |
One amusing detail: when we opened the public URL right after the reboot, the page's uptime read "0 hours 0 minutes". It was proof that the freshly rebooted machine itself was visible from the internet, exactly as it was.
Summary
Over three installments we went from a headless setup, through hardening, to publishing on the web. The Raspberry Pi is now a server you can use from the internet without having opened a single inbound port for publishing!
Reachable from the internet also means reachable from your phone. And since this is a Raspberry Pi, you could control home devices from your phone while out, blink an LED of course, attach a camera and take a look — the possibilities are practically endless.
So this Raspberry Pi will grow from here into a small always-on server at home.
As more things get added to it, we hope to write about them again.
See you next time!
Sources & References
- WireCanal official site
- WireCanal Linux setup guide (the service template comes from here)
- Raspberry Pi Documentation (official documentation)
Related articles
- Setting Up a Raspberry Pi 5 Without a Monitor: From OS Imaging to SSH Using Only a Windows PC (Part 1)
- Hardening a Raspberry Pi 5: SSH keys, UFW, fail2ban — and the trap where IPv6 comes back after a reboot (Part 2)
- Use a Local LLM on Your Home PC from Your Phone While Out: Ollama + Open WebUI + WireCanal
- What Sets ngrok and WireCanal Apart? The Developers Compare Pricing, Operations, and MCP Design



